Showing posts with label 1911 Build. Show all posts

Saturday, December 30, 2017

Last Photo of Rock Island G.I. Before Cutting On It


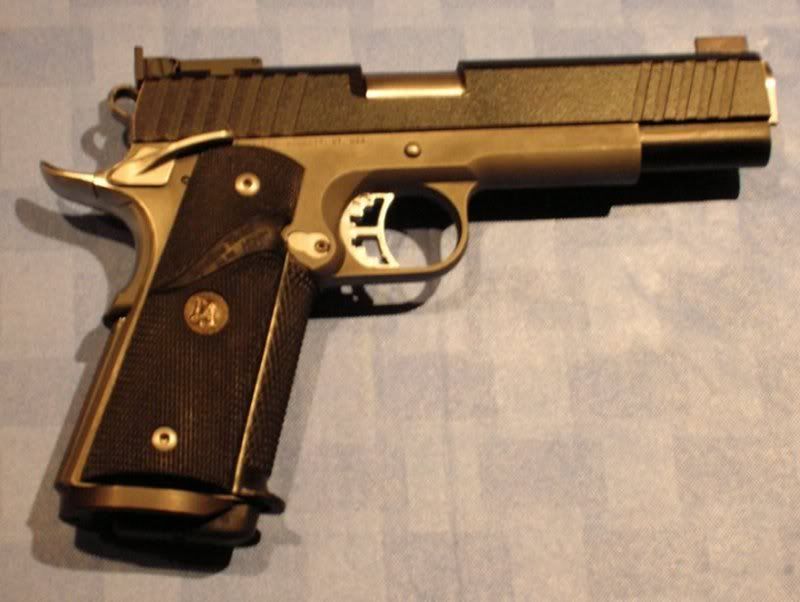
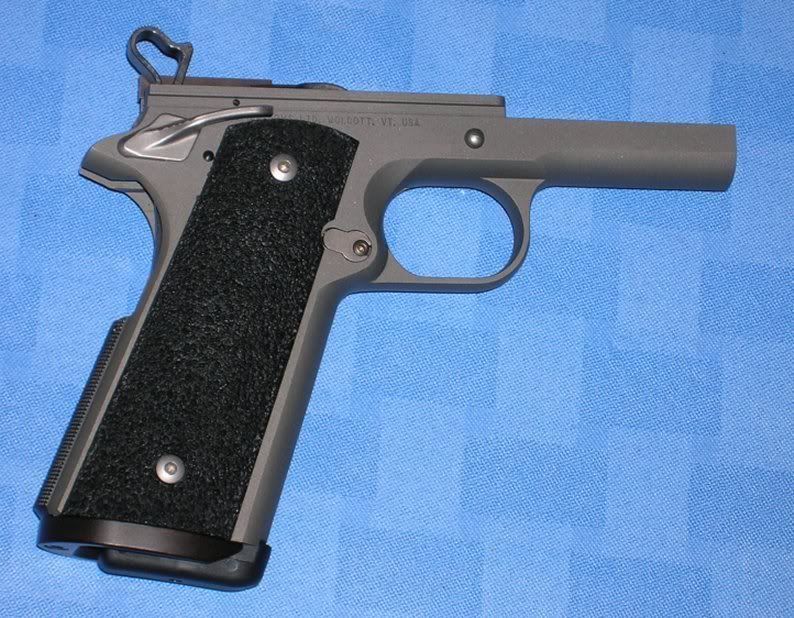
Posting one last picture of the Rock Island FS GI 9mm before I start to cut on it.  I haven't changed much since I posted the review, with the exception of the stainless EGW National Match barrel bushing, which you can kinda see in the photo here. 

I don't really need to change the trigger, but I want the black trigger for a stainless frame pistol, to be completed later, maybe 2019.  I'm going to need to change the pre-travel adjustment for the new hammer and sear anyway.

It will be getting a new grip safety also, but I'm not going to show that just yet.  The G.I. grip safety isn't so bad, after you "melt" it a little bit, but the web of my hand gets hooked on the frame tangs sometimes, which keeps me from getting a consistent grip.

I now have a milling machine in the basement, so will be doing most of the work myself.  I think I may hand off the slide to a local gunsmith for staking the front sight.  I don't want a dovetailed front sight for this particular pistol.  I want to use the Bo-Mar front sight and I don't particularly want to buy or make a staking tool just for this one job.  I also want the job done well the first time, since I can't just order another Bo-Mar front sight from Brownell's, Midway, or from the manufacturer.

Saturday, January 17, 2009

1911 Build: Adjustable Sight Installed


I drilled and tapped the STI slide today, per BlindHogg's advice, and installed the Wilson BoMar-type adjustable sight. I've posted pictures of the assembled pistol before with the sight, but it was only slotted into place without the elevation adjustment screw.

It went much smoother than I had thought it would. The divot from the larger drill bit helped guide the one that actually drilled the hole. The bit went through the steel with very little effort. The tap cut the threads without breaking off in the hole (ugh, that really sucks). The edges of the leaf of the sight match up perfectly with the edges of the flat on the top of the slide. It was a high pucker factor job because I was working on the most expensive part of the pistol, but I couldn't be much happier with how it turned out.

The front sight is too tall, so it's shooting about 6" low. I ordered a tall front sight blank, so that I wouldn't end up with one that's too short. It's easier to file a tall front sight than it is to add height to one that's too short.

I was only shooting at about 25 feet, but I was able to get a group without much effort. The hardball rounds and the new lead semi-wadcutter ammo that I've been putting together both hit the same spot on the target. I haven't had any functional problems with either the CheckMate/Colt magazine or the CMC ProMag since the first outing.


I've been filing on the ejector of the M&P, and that hasn't been going so well. No matter what I've done, it's still throwing the brass at me. I seem to be shooting it a lot better than I was though.

I tried 15 and 13 pound recoil springs. I had thought that the 13 pound spring moved ejection more to the left, but I shot with the 15 pound spring again today, and I'm not really sure that there's any difference at all, besides maybe the speed of the ejecting brass.

Monday, January 12, 2009

1911 Build Index

1911 Build Has Started, I Guess - First parts ordered. 1911 build intro.
Snag - Midway wanted $60 for shipping a frame.
Frame Ordered, Really This Time - Ordered Basic frame straight from Caspian
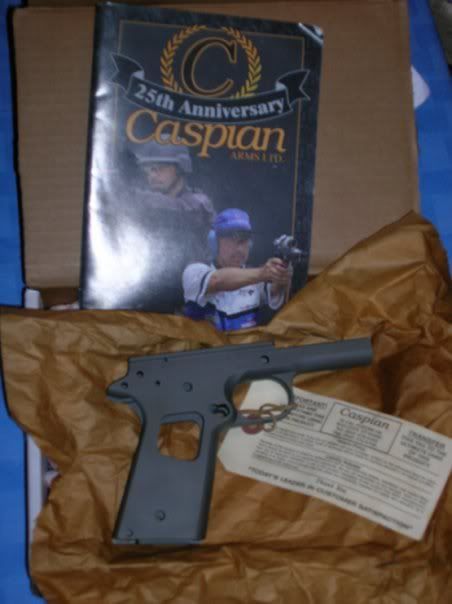
Picked Up The Caspian Frame - . . . after waiting two months. First set of pictures.
1911 Build Progress - Barrel lower lugs not hitting impact surface.
1911 Build Weekend Update - Cutting 1/4" radius on frame tangs, fitting the grip safety, slide is fitted.
1911 Build Weekend Update II - EGW parts order lost, barrel timing.
1911 Build This Week - Changed grips. Basic progress update.
1911 Build: Getting Close To Test Fire - Picture of semi-finished pistol, more barrel fitting.
1911 Build: EGW Order Came In - Last few parts arrive.
1911 Build: It Works!! - First outing with the assembled pistol.
1911 Build: Parts List
1911 Build: Adjustable Sight Installed

Saturday, January 3, 2009

1911 Build: Parts List


The frame is a Caspian Basic in carbon steel. I've reported that.

The slide is an STI 5" "Unique" cut. The slide is milled for a Bo-Mar type adjustable rear sight, and a dovetail front sight. It has a flat top and front cocking serrations. It was made to order, and took a few weeks.

The rest of the parts are as follows.

PART
BRAND/MODEL
SOURCE

Barrel
Kart Easy-Fit, 5" non-ramped
Brownell's

Barrel Bushing
Kart Easy-Fit
Brownell's

Barrel Link
Kart Easy-Fit
Brownell's

Barrel Link Pin
Kart Easy-Fit
Brownell's

Disconnector
Extreme Engineering Ultralight
Shooter's Connection

Ejector
EGW Extended
Midway

Ejector Pin
EGW
Shooter's Connection

Extractor
Aftec
Shooter's Connection

Firing Pin
STI Titanium - .38Super/9mm*
Brownell's

Firing Pin Spring
Wolff Extra Power
Brownell's

Firing Pin Stop
EGW Oversize, Series 70
EGW

Front Sight
Yost Bonitz blank
Midway

Grip Bushings
Cylinder & Slide
Midway

Grip Safety
Chip McCormick Extreme
Midway

Grip Screws
Kimber
(temporary)

Grips
Pachmayr Signature GM-45
Midway

Guide Rod
Wilson 1-Piece, G.I. style
Midway

Guide Rod Plug
"O.E." (Actual Source Unknown), checkered, appears to be dark Parkerized
CDNN Investments

Hammer
Extreme Engineering Ultralight
Shooter's Connection

Hammer Link Pin
EGW
Shooter's Connection

Hammer Pin
Kimber (with groove for "pinned" ambi safety)
Midway

Hammer Strut
Ed Brown
Midway

Magazine Catch Lock
Kimber
(temporary)

Magazine Catch Spring
Kimber
(temporary)

Magazine Catch/Release
Kimber
(temporary)

Mainspring
Wolff 18lb.
Brownell's

Mainspring Cap
EGW
Shooter's Connection

Mainspring Cap Pin
EGW
Shooter's Connection

Mainspring Housing
Ed Brown Maxi-Well, 25lpi Checkering
Midway

Mainspring Housing Pin
EGW
Shooter's Connection

Mainspring Plunger Detent
EGW
Shooter's Connection

Plunger Spring
Kimber
(temporary)

Plunger Tube
EGW bolt-on
EGW

Rear Sight
Wilson Bo-Mar type
Shooter's Connection

Recoil Spring
Wolff (16lb., for now)
Midway

Sear
Extreme Engineering Ultralight
Shooter's Connection

Sear Pin
EGW
Shooter's Connection

Sear Spring
Clark 4-leaf
Brownell's

Slide Stop
Wilson extended
Midway

Thumb Safety
Kimber "Pinned" ambi
Midway

Trigger and long curved shoe insert
SVI
Brownell's


Except for the hammer pin which came with the thumb safety, and the barrel link pin which came with the barrel, the pins and plungers all came in a set.
Some parts were borrowed from a Kimber 1911, until I get around to buying the rest of the parts.
Barrel, bushing, link, and link pin all came as a set.
Hammer, sear, and disconnector came as a set.

* - all STI Slides are set-up for .38Super/9mm firing pins

Tuesday, December 9, 2008

1911 Build: It Works!!


I fit the bolt-on plunger tube from EGW, and carved out the left grip panel to fit over it. The firing pin stop has been fit to the slide, trimmed to fit under the Wilson adjustable sight, and radiused. After that, the pistol was complete, except for drilling and tapping the slide for the rear sight adjustment screw.

I took it out and shot a box of hardball through it. I had a few stoppages, but I think that’s mostly because it’s still a little tight and the paint that I sprayed on the slide to keep it from rusting was flaking off and jamming up the works. It's also possible that the recoil spring hadn't taken a set yet.

Loaded rounds are not ejecting. I think it’s because the EGW extended ejector is about a half inch or more longer than the military issue part, but I’ll check with the gurus first.

The barrel lugs don't appear to be battered. Firing pin strikes on the primers are only about a thirty-second off center, I don't see any primer flow, and the brass isn't getting beat up.

Thursday, December 4, 2008

1911 Build: EGW Order Came In!


I got the last two parts that I need to finish the 1911. The order that I placed October 11th finally came in. The one that got lost, I waited, asked about, asked about, and asked about, got reshipped on Tuesday and came today, via UPS this time. Sigh.

Thanksgiving and hunting season (that's what the machinist at EGW said) delayed the reshipment.

As soon as I get the plunger tube and firing pin stop fitted, I can test-fire.

Wednesday, November 26, 2008

1911 Build: Getting Close to Test Fire


No, I'm not going to leave the front sight like that. I just haven't gotten around to reshaping it yet.

I've got the barrel to where it locks up. I still need to tap the back of the slide the last little bit, but I'll put some hardball through it before filing any more. If it's still tight after a couple boxes of ammo, then I'll file again.

The rear of the slide matches up almost perfectly with the rear of the frame rails. I can delay blending the two together for a while.

The EGW extended, oversize ejector is fitted to the frame, but sticks out the back of the slide, and needs blending.

Still don't have the bolt-on plunger tube or oversize firing pin stop from EGW. I'll e-mail them again about the order shortly.

To Do List:
Blend and tune ejector
Adjust overtravel and pretravel stops
Fit firing pin stop
Drill and tap frame for plunger tube
Drill and tap slide for rear sight screw
Drill hole in slide for front sight roll pin
Blend rear of frame rails/slide/ejector
Paint or blue frame, grip safety, slide stop, thumb safety
Shape front sight
Serrate rear of front and rear sights
Match slide stop (angular edges) to thumb safety (rounded edges)
Install and tune extractor
Test and tune
Cut the funky lip off the bottom of the grip frontstrap

That's about all that I can think of for now.

Next time I post, I'll fill you in on all the parts I've used, and maybe a picture of all the tools.

Sunday, November 16, 2008

1911 Build This Week


I haven't posted any updates on the build recently, because I was practicing for the championship match at a local club. Turned out to be a bit of a disaster for me, because I hadn't anticipated a bullseye stage. But I digress. . .

Picture's not great, but there will be more to follow in the future.

I dumped the Falcon Ergo grips. The grip texture is nice, but the panels don’t come far enough forward for my taste. I picked up a set of Pachmayer Signature GM-45 grips. I wasn’t thrilled about the idea of rubber grips, but they feel right and aren’t as tacky (as in sticky, not unfashionable) as the Hogue rubber grips, allowing some grip readjustment. The only small issue with the Signature grips is that they really aren’t made for pistols with magwells, as the bottom of the grip panels are tapered. I will probably cut off the lip at the bottom of the frontstrap too, because it doesn’t allow you to get a grip on the magazine basepad or baseplate if there’s a double feed and you need to rip out the magazine.

The grip safety is 100% finished now, I think. The left side of the thumb safety has been cut to match the curve of the grip safety.

EGW is going to resend my order on Monday. USPS put up a fight on the lost package claim.

I did get the dovetail file from Midway, so I got the Wilson Bo-Mar type sight installed on the slide the day after I took the picture. Either the sight's dovetail was too large, or the cut in the slide was too shallow. Either way it took quite a while to get it to fit. I'm pretty sure the Wilson sight is hardened steel, as it put up a fight. The Yost Bonitz front sight that was supposed to fit according to Midway, had a dovetail that was way too large to fit the cut in the STI slide, so I spent a couple hours filing it to fit the slide. I still have to shape it, and then file it to the right height eventually.

Got some Dykem for fitting the barrel in the same order as the dovetail file, so I can get working on that too.

Monday, October 27, 2008

1911 Build Weekend Update II


My Build Is Cursed

My order from EGW was lost in the mail. Tracking number says it was delivered to Chester, PA. Nobody is sure why. The guys at EGW will try sending the order again, but didn't say when. I hope they're not going to stall until they get a refund from USPS, I haven't got forever to wait.

I had ordered an EGW .45ACP firing pin from Shooter's Connection, not knowing that the slide I ordered was cut for .38Super/9mm firing pins. I sent that back First Class Mail for an exchange, and USPS lost that too.

This Week's Progress
The bottom side of the beavertail is about 99% finished. Just needs a little bit of sanding.

10/25/08
With the slide just out of battery, I didn't have the minimum 0.01" clearance between the upper lugs of the barrel and the slide. I sanded down the barrel bed of the frame so that the feeler gage fit with a minimum of drag. Fortunately, the lower lug is now coming into contact with the vertical impact surface of the frame.

Bodily Damage Tally - 2
I got my first blister hammering the slide on and off the frame. At some point, during the process of sanding either the dowel to 0.7", or lowering the barrel bed, I raised another blister.

Monday, October 13, 2008

1911 Build Weekend Update


I've decided to only post updates on weekends from now on. Now that I have pretty much all the parts I need, I can make progress whenever I find some time for it. Posting daily, or at least several times a week would create too much clutter.

10/11/08 Progress Cutting 0.25" Radius on Frame For Grip Safety
Time - About 3 Hours (while watching TV, as usual)

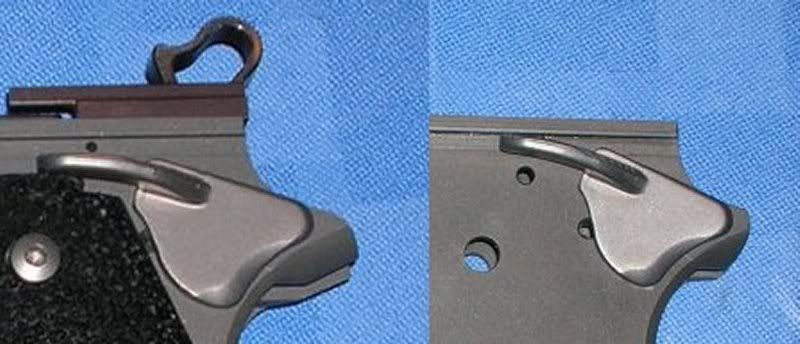
Before and After Comparison Picture

Pen Pointing to Where Tangs Need to be Blended Under the Grip Safety

Pen Pointing to Where Tangs Need to be Blended on Top Side of the Grip Safety. The grip safety is held out farther than it would be if the mainspring housing were containing it to exaggerate the misalignment for photo purposes.

Although I was tempted to pull out the Dremel, I did it all by hand with files with a lot of the frame covered in masking tape. The grip safety hasn't been made functional at this point. I was just happy that I got the safety to fit, and without needing to get more metal welded or silver soldered onto the tangs of the frame.

I fit the trigger a week before. Seems like a pretty simple thing to do, but it took me about 3 hours. Getting the trigger shoe to fit tight enough not to wiggle, but loose enough to move freely requires a lot of filing, painting the part with Sharpie ink, and trial fitting. I'll post a picture of the trigger fitted into the slide when I have a reason to post a picture of the frame assembled again.

10/17/08 Current Status
Still working on fitting the slide. I've gotten it to go all the way back, but it's still very tight. Every time I hammer it back on it gets a little bit easier. Progress is slow on fitting the slide, because hammering it on and off the frame is noisy and I don't want to wake anyone up. The time I have to work on the pistol during the morning hours is about a 45 minute window, and I don't always get to spend it working on the pistol.

I am making some progress on blending the grip safety, but there's still a lot of filing left to do, and sanding after that.

I've got to load up some ammo this weekend, so I'm not sure how much I'll get done.

The bolt-on plunger tube and oversize firing pin stop that I ordered from EGW should be coming in the mail Saturday or Monday. I've got to drill and tap the frame for the plunger tube, and inlet the grips to clear the mounting flange. The firing pin stop will probably have to be filed to fit into the slide, the top will have to be cut down to make room for the rear sight (hint), and the right side of the stop will need to be radiused for the extractor to pivot (hint).

10/18/08 Finished Fitting the Slide
I did just a little more hammering, a little more filing. After banging the slide back and forth with the lapping compound on the rails, I was able to move the slide by hand for the first time! Before I knew it the slide was sliding off the frame with only a little help from gravity.

The underside of the beavertail is about 90% blended. A little bit of sanding, and it would be better than most factory jobs, but I'm going to do some more detail work, and then start on the topside.

I guess I better hurry up and buy some longer links. I'm getting close to having a functional pistol!

Saturday, October 11, 2008

Updates, 1911 Build Progress


I've been going through posts and updating them, cross-referencing posts, adding links, and trying to make the site easier to navigate. I've gone through about 75 of 115 posts.

1911 Build
I'm working on fitting the slide to the Caspian frame, wearing out a plastic deadblow hammer in the process. You'll get a look at the slide when I'm finished. I put in an order with EGW for the last of the parts I need to finish the pistol. Well, not quite. I'll need a longer barrel link to get the timing right, the barrel is hitting the top of the frame without the barrel's lower lug hitting the vertical impact surface of the frame.

Thursday, October 2, 2008

Picked Up The Caspian 1911 Frame


Tuesday I went to the gun shop, to ask what was going on. It had been over 2 months since the owner told me that he would order the frame. He called Caspian, and they said the frame had shipped the 26th. I said “okay,” and left. A couple hours later, just as I’m going in to work, my cell phone rings. It’s the guy from the gun shop. My frame came in.

What are the odds, that I wait 2 months, and it shows up less than 2 hours after I leave the shop?

This is what my life is like, folks.

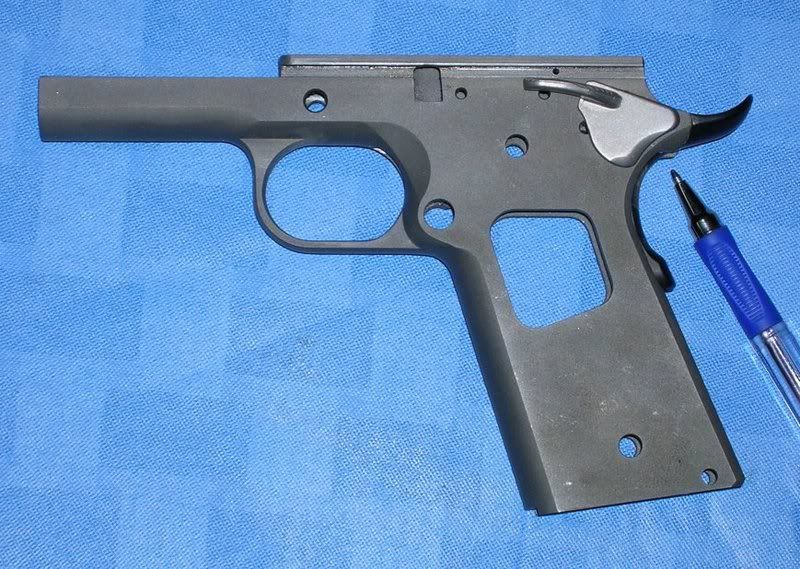
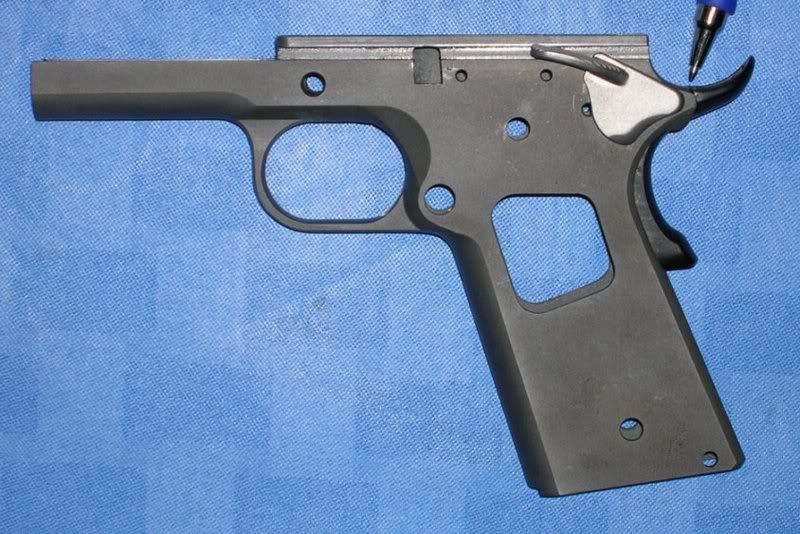
So I picked up the frame yesterday. I had a little time to look it over and fondle it. I screwed on the buttons for chopping the frame for the beavertail. I think the grip safety will fit properly after I file the tips of the frame tangs down. I hope I don’t end up with this situation.

The humble beginnings. Yeah, I'm really building a pistol from a bare frame.

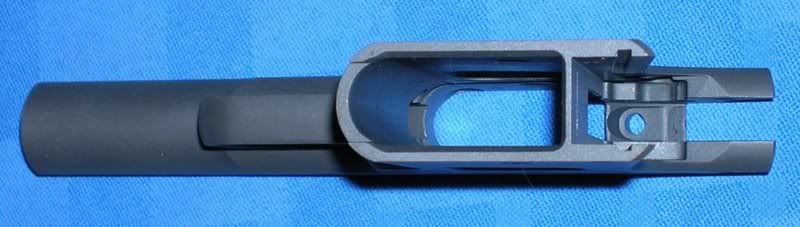
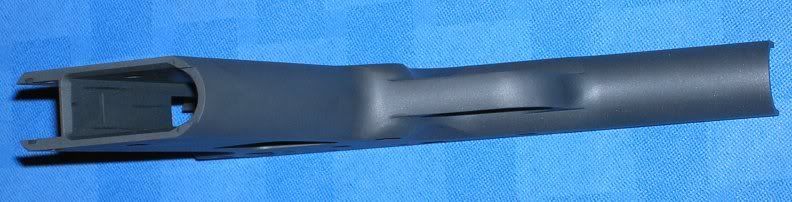
The Caspian Basic frame has an undercut trigger guard, and a modestly beveled mag well. I was hoping it wouldn't have a mag bevel, because I'll be using a magazine funnel, and the bevel won't look right until I get a milling machine or have a gunsmith blend the mag funnel.

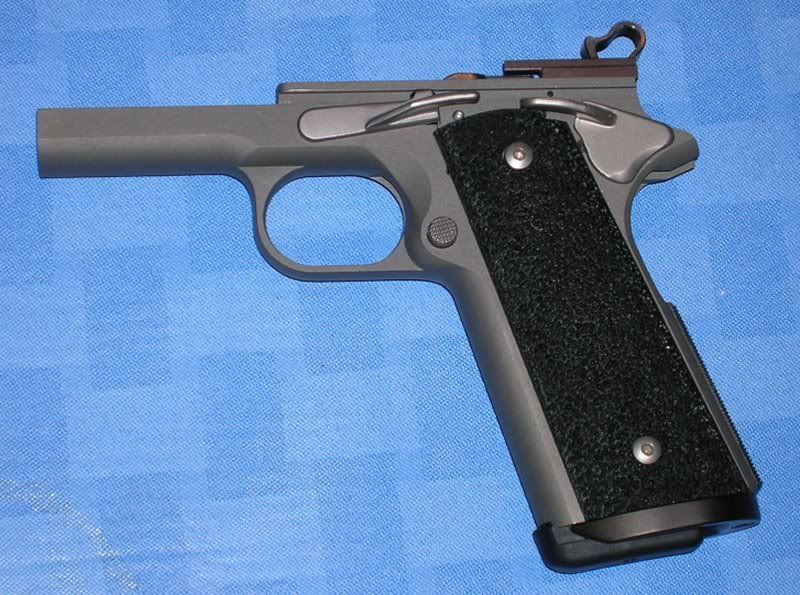
After work, I put on every part that I could fit, without grinding or filing anything.


The undercut trigger guard can be seen in these pictures pretty well. This allows the middle finger to get a higher hold on the pistol frame. Coupled with the Chip McCormick high-ride beavertail grip safety, it will allow a very high grip for controlling recoil.

The trigger's not in the pictures because I need to file it before it will fit into the slot. The grip safety needs pretty extensive fitting, and isn't pictured. The plunger tube isn't fitted, because I haven't ordered it from EGW yet. The grip screw bushings were only loosely snugged to the frame, no red LocTite or staking yet.

Everything else fit pretty painlessly. Getting the sear, disconnector, and sear pin fitted into the frame properly is a pain in the butt though. I'll not be removing those parts any more than absolutely necessary.

I was pretty set on painting the frame black, until I'm satisfied with all the parts, the mag funnel is blended in, the fronstrap is checkered, and I'm sure that I'm not going to mess with it any further. Later, I would get it E-Treated or Melonite treated.

Seeing the parts assembled on the raw, grey, carbon steel frame, I'm thinking that I might have to change that plan and paint it grey. I dunno. Paint is cheap, fairly easy to apply, and comes off easy with chemical paint stripper, so it's not a real big deal either way.

Friday, July 18, 2008

1911 Build Hits Snag


On Tuesday, I went into the local gun shop, and had the owner put in an order for a Caspian Government model frame from Midway. He said it would be a while before he knew what the shipping would run, but I didn't think much of it, and put down a $100 deposit.

Got a call from him today. Midway wants to charge over $60 to ship just a frame! Now, they do have to use overnight shipping to send a handgun across a state border, but last I checked, the cost was something like $28 plus tax.

So he's checking with Caspian, to see what they can do.

There are several things that could happen:
1. I could get lucky, and Caspian has a carbon steel Basic frame in stock, and I might actually save some money.
2. I eat the $60+ shipping charge from Midway, since the deposit is non-refundable, and continue as planned. So that's $175 for the frame, $60 for shipping, plus the transfer fee, and sales tax just for a stripped 1911 frame in the white.
3. I wait several weeks to get a frame from Caspian.
4. I order a Springfield G.I. 1911A1, strip everything off the frame, and end up with my Ultimate 1911, and have a box full of parts left over. Maybe I sell off some of the parts for less than they're worth.

Wednesday, June 25, 2008

1911 Build Has Started, I Guess. Intro.


My "Economic Stimulus" check is coming soon, I've got birthday checks to cash, and my bank and investment accounts are doing okay. I figure it's okay to spend some money.

The Ed Brown Maxi-Well with 25lpi checkering was on sale at Midway, and the CMC grip safeties were in stock, so I ordered them along with the Kuhnhausen shop manual, along with 1500 rounds of the MiniMags for my Glock rimfire conversion, and a Lula mag loader for the AK clone.

I guess the 1911 build has officially started.

Backstory
I’ve been on a quest to build a competition 1911 to my liking. I would prefer not to buy a complete pistol, even if it’s cheaper to go that way. I want a gunsmithing project.

I looked into using a Armscor/Charles Daly/RIA pistol as a base gun, but dropped the idea after reading a handful of reports of rattling pistols. I want to build a bullseye accurate pistol, and I’m not sure that a rattletrap frame/slide fit will cut it.

I looked into using a Taurus pistol as a base, but I’d pretty much be stuck with the grip safety that comes with the pistol, and the slide to frame fit may not be as tight as I’d like. Springfield (actually Imbel made) frames are not made to John Brownings specs, and you are very limited in which grip safeties you can use.

Ideally, I would like a frame with a long dustcover. Les Baer quoted me $595.00 for a Monolith frame, which I think is the retail price for a complete Taurus PT1911. The STI RangeMaster frames are cast/cut for ramped barrels, which are generally not recommended for .45ACP pistols. SVI makes frames with long dustcovers, but will not sell the frames separately.

So, maybe I should just use a standard frame, and maybe someday down the line, a longer frame will be available at a reasonable price. I think it will happen.

So, I think I’m going to start with a Caspian frame and STI slide, and piece together the pistol that I want, with a minimum of leftover parts. Caspian casts and machines their frames here in the U.S. of A, while the Tauri, Armscor, and Springfield Armory frames and slides are all made somewhere else. “Made In America” doesn’t seem that important until it’s the job you do getting outsourced.

Edit To Add
Just to be clear, this pistol will not be replacing any Glocks for carry and/or competition. Should I ever get the itch to shoot bullseye, it may get used for that. Otherwise, I may take it out to the range, or shoot action pistol matches with it if I get the itch. Mostly, it's going to be a puzzle for me, except I know where all the pieces go, they just don't fit together properly yet.