I've decided to only post updates on weekends from now on. Now that I have pretty much all the parts I need, I can make progress whenever I find some time for it. Posting daily, or at least several times a week would create too much clutter.
10/11/08 Progress Cutting 0.25" Radius on Frame For Grip Safety
Time - About 3 Hours (while watching TV, as usual)
 Before and After Comparison Picture
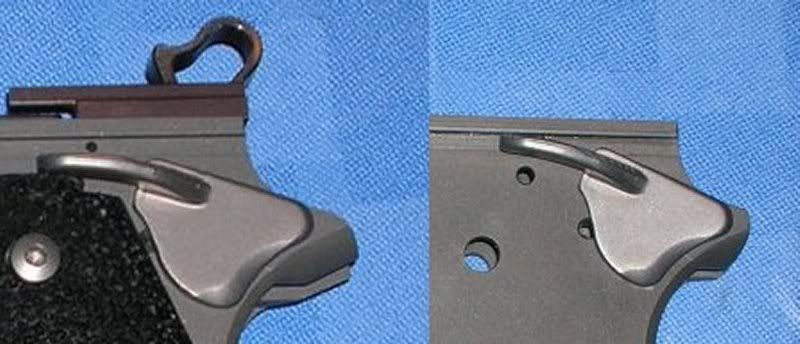
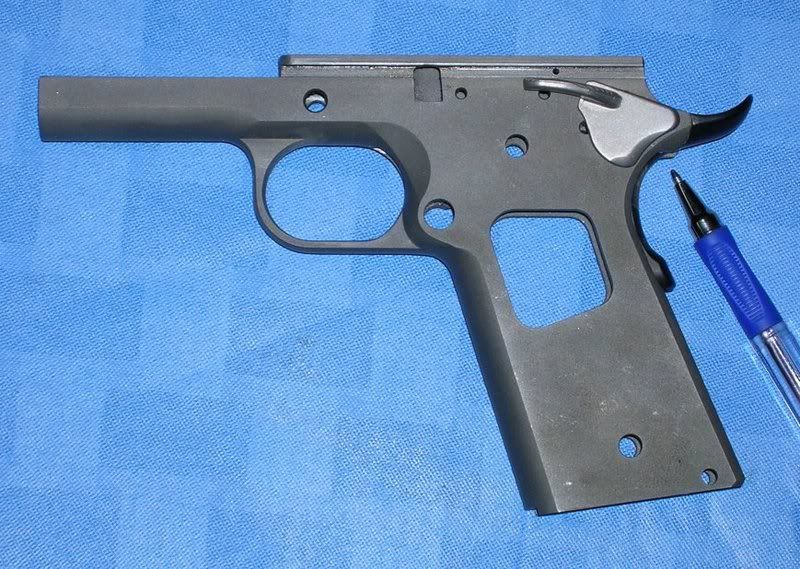 Pen Pointing to Where Tangs Need to be Blended Under the Grip Safety
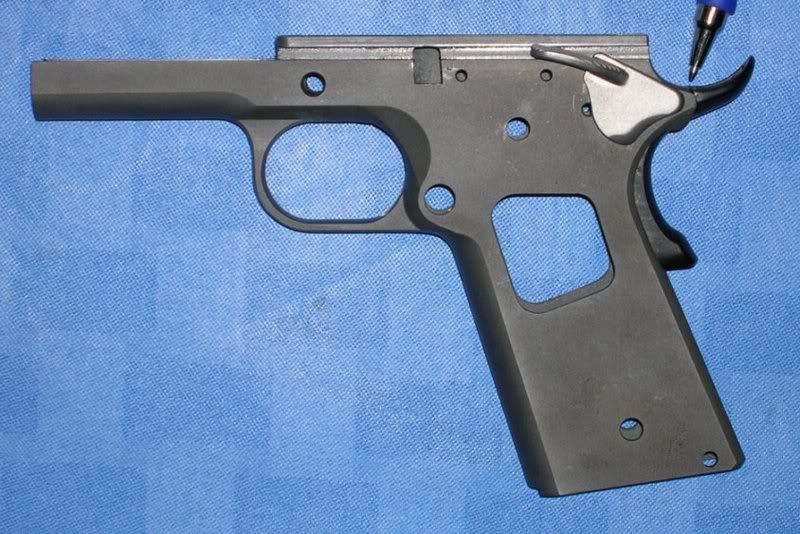 Pen Pointing to Where Tangs Need to be Blended on Top Side of the Grip Safety. The grip safety is held out farther than it would be if the mainspring housing were containing it to exaggerate the misalignment for photo purposes.
Although I was tempted to pull out the Dremel, I did it all by hand with files with a lot of the frame covered in masking tape. The grip safety hasn't been made functional at this point. I was just happy that I got the safety to fit, and without needing to get more metal welded or silver soldered onto the tangs of the frame.
I fit the trigger a week before. Seems like a pretty simple thing to do, but it took me about 3 hours. Getting the trigger shoe to fit tight enough not to wiggle, but loose enough to move freely requires a lot of filing, painting the part with Sharpie ink, and trial fitting. I'll post a picture of the trigger fitted into the slide when I have a reason to post a picture of the frame assembled again.
10/17/08 Current Status
Still working on fitting the slide. I've gotten it to go all the way back, but it's still very tight. Every time I hammer it back on it gets a little bit easier. Progress is slow on fitting the slide, because hammering it on and off the frame is noisy and I don't want to wake anyone up. The time I have to work on the pistol during the morning hours is about a 45 minute window, and I don't always get to spend it working on the pistol.
I am making some progress on blending the grip safety, but there's still a lot of filing left to do, and sanding after that.
I've got to load up some ammo this weekend, so I'm not sure how much I'll get done.
The bolt-on plunger tube and oversize firing pin stop that I ordered from EGW should be coming in the mail Saturday or Monday. I've got to drill and tap the frame for the plunger tube, and inlet the grips to clear the mounting flange. The firing pin stop will probably have to be filed to fit into the slide, the top will have to be cut down to make room for the rear sight (hint), and the right side of the stop will need to be radiused for the extractor to pivot (hint).
10/18/08 Finished Fitting the Slide
I did just a little more hammering, a little more filing. After banging the slide back and forth with the lapping compound on the rails, I was able to move the slide by hand for the first time! Before I knew it the slide was sliding off the frame with only a little help from gravity.
The underside of the beavertail is about 90% blended. A little bit of sanding, and it would be better than most factory jobs, but I'm going to do some more detail work, and then start on the topside.
I guess I better hurry up and buy some longer links. I'm getting close to having a functional pistol!
No comments:
Post a Comment