Thursday, October 30, 2008
Lone Wolf To Produce Aftermarket Glock Frames
Lone Wolf has prototyped their own frame to take Glock parts. Their frame will have interchangable grips, a provision for an internal laser, a rounded trigger guard, and an extended beavertail.
JR, the owner, says that he's shooting for a price under $200, which sounds reasonable to me, considering that Glock frames are really not available a la carte at any price.
I really have no use for such a creature, but it may be an interesting option to some, providing that it works better than the metal aftermarket frames, which seem to need gunsmithing to work properly.
I suspect that it will probably be a year or more before one is available for sale. The flyer says "Available February 2009, but I've been waiting for them to release the G34/G35 length 10mm slides for something like 10 months now. Unless they've been secretly working on these frame for quite a while, I wouldn't bet on them being for sale as soon as February.
Monday, October 27, 2008
Taurus Rebates: $75 off PT1911, $50 off 24/7 OSS
Rebate expires December 31, 2008.
I've seen the PT1911s for $499 at gun shows. $425 would be a helluva deal, even if you need to replace the thumb safety and extractor at some point down the line.
Question is, will you be able to find one for sale, now?
1911 Build Weekend Update II
My Build Is Cursed
My order from EGW was lost in the mail. Tracking number says it was delivered to Chester, PA. Nobody is sure why. The guys at EGW will try sending the order again, but didn't say when. I hope they're not going to stall until they get a refund from USPS, I haven't got forever to wait.
I had ordered an EGW .45ACP firing pin from Shooter's Connection, not knowing that the slide I ordered was cut for .38Super/9mm firing pins. I sent that back First Class Mail for an exchange, and USPS lost that too.
This Week's Progress
The bottom side of the beavertail is about 99% finished. Just needs a little bit of sanding.
10/25/08
With the slide just out of battery, I didn't have the minimum 0.01" clearance between the upper lugs of the barrel and the slide. I sanded down the barrel bed of the frame so that the feeler gage fit with a minimum of drag. Fortunately, the lower lug is now coming into contact with the vertical impact surface of the frame.
Bodily Damage Tally - 2
I got my first blister hammering the slide on and off the frame. At some point, during the process of sanding either the dowel to 0.7", or lowering the barrel bed, I raised another blister.
Monday, October 13, 2008
1911 Build Weekend Update
I've decided to only post updates on weekends from now on. Now that I have pretty much all the parts I need, I can make progress whenever I find some time for it. Posting daily, or at least several times a week would create too much clutter.
10/11/08 Progress Cutting 0.25" Radius on Frame For Grip Safety
Time - About 3 Hours (while watching TV, as usual)
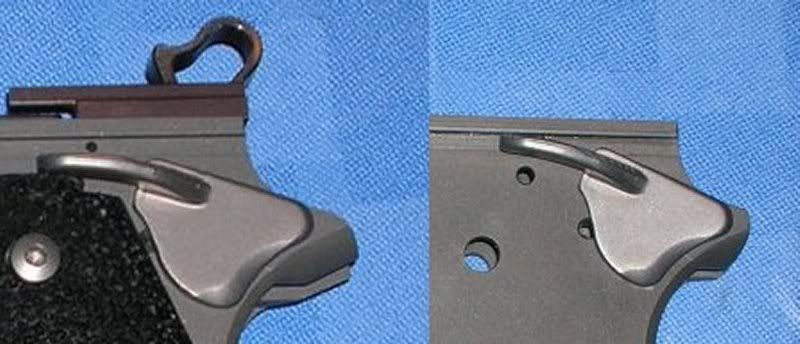 Before and After Comparison Picture
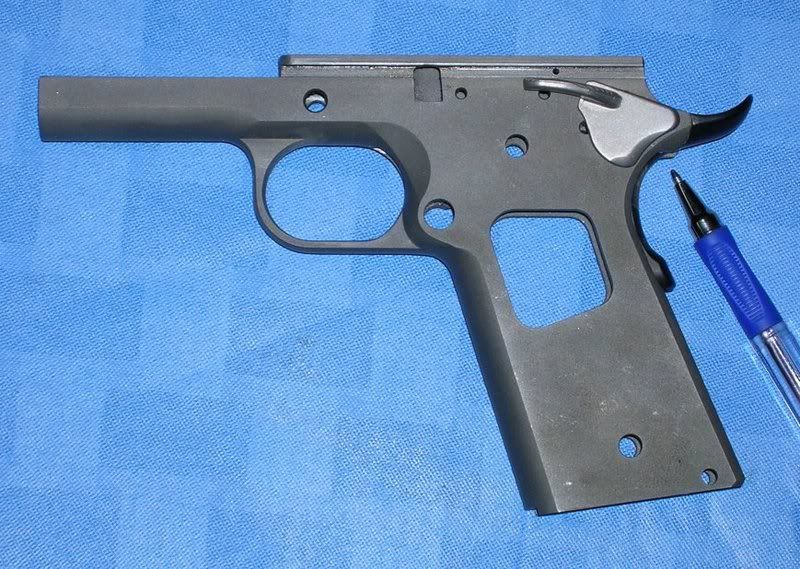 Pen Pointing to Where Tangs Need to be Blended Under the Grip Safety
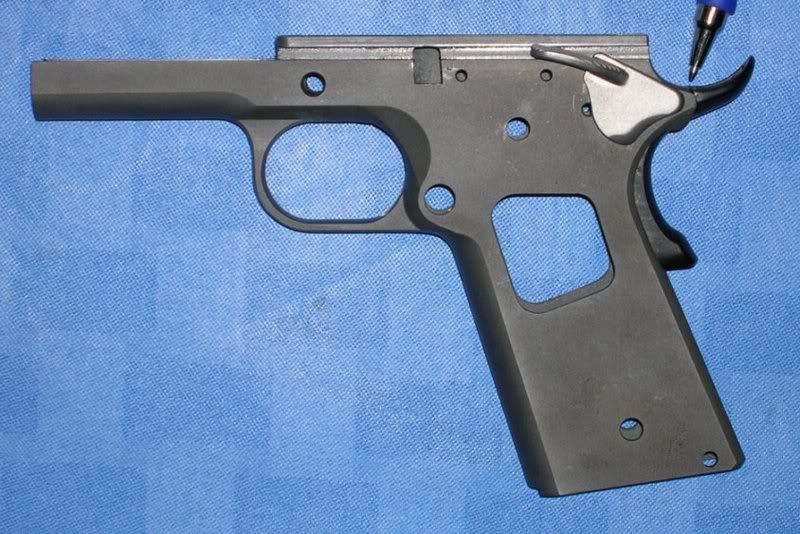 Pen Pointing to Where Tangs Need to be Blended on Top Side of the Grip Safety. The grip safety is held out farther than it would be if the mainspring housing were containing it to exaggerate the misalignment for photo purposes.
Although I was tempted to pull out the Dremel, I did it all by hand with files with a lot of the frame covered in masking tape. The grip safety hasn't been made functional at this point. I was just happy that I got the safety to fit, and without needing to get more metal welded or silver soldered onto the tangs of the frame.
I fit the trigger a week before. Seems like a pretty simple thing to do, but it took me about 3 hours. Getting the trigger shoe to fit tight enough not to wiggle, but loose enough to move freely requires a lot of filing, painting the part with Sharpie ink, and trial fitting. I'll post a picture of the trigger fitted into the slide when I have a reason to post a picture of the frame assembled again.
10/17/08 Current Status
Still working on fitting the slide. I've gotten it to go all the way back, but it's still very tight. Every time I hammer it back on it gets a little bit easier. Progress is slow on fitting the slide, because hammering it on and off the frame is noisy and I don't want to wake anyone up. The time I have to work on the pistol during the morning hours is about a 45 minute window, and I don't always get to spend it working on the pistol.
I am making some progress on blending the grip safety, but there's still a lot of filing left to do, and sanding after that.
I've got to load up some ammo this weekend, so I'm not sure how much I'll get done.
The bolt-on plunger tube and oversize firing pin stop that I ordered from EGW should be coming in the mail Saturday or Monday. I've got to drill and tap the frame for the plunger tube, and inlet the grips to clear the mounting flange. The firing pin stop will probably have to be filed to fit into the slide, the top will have to be cut down to make room for the rear sight (hint), and the right side of the stop will need to be radiused for the extractor to pivot (hint).
10/18/08 Finished Fitting the Slide
I did just a little more hammering, a little more filing. After banging the slide back and forth with the lapping compound on the rails, I was able to move the slide by hand for the first time! Before I knew it the slide was sliding off the frame with only a little help from gravity.
The underside of the beavertail is about 90% blended. A little bit of sanding, and it would be better than most factory jobs, but I'm going to do some more detail work, and then start on the topside.
I guess I better hurry up and buy some longer links. I'm getting close to having a functional pistol!
Saturday, October 11, 2008
Updates, 1911 Build Progress
I've been going through posts and updating them, cross-referencing posts, adding links, and trying to make the site easier to navigate. I've gone through about 75 of 115 posts.
1911 Build
I'm working on fitting the slide to the Caspian frame, wearing out a plastic deadblow hammer in the process. You'll get a look at the slide when I'm finished. I put in an order with EGW for the last of the parts I need to finish the pistol. Well, not quite. I'll need a longer barrel link to get the timing right, the barrel is hitting the top of the frame without the barrel's lower lug hitting the vertical impact surface of the frame.
Thursday, October 2, 2008
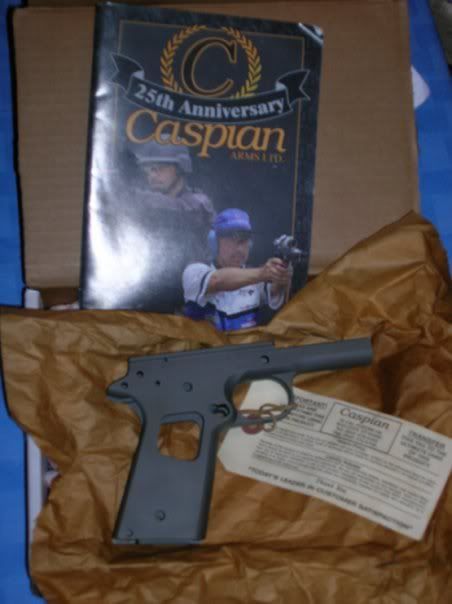
Picked Up The Caspian 1911 Frame
Tuesday I went to the gun shop, to ask what was going on. It had been over 2 months since the owner told me that he would order the frame. He called Caspian, and they said the frame had shipped the 26th. I said “okay,” and left. A couple hours later, just as I’m going in to work, my cell phone rings. It’s the guy from the gun shop. My frame came in.
What are the odds, that I wait 2 months, and it shows up less than 2 hours after I leave the shop?
This is what my life is like, folks.
So I picked up the frame yesterday. I had a little time to look it over and fondle it. I screwed on the buttons for chopping the frame for the beavertail. I think the grip safety will fit properly after I file the tips of the frame tangs down. I hope I don’t end up with this situation.


The Caspian Basic frame has an undercut trigger guard, and a modestly beveled mag well. I was hoping it wouldn't have a mag bevel, because I'll be using a magazine funnel, and the bevel won't look right until I get a milling machine or have a gunsmith blend the mag funnel.
After work, I put on every part that I could fit, without grinding or filing anything.
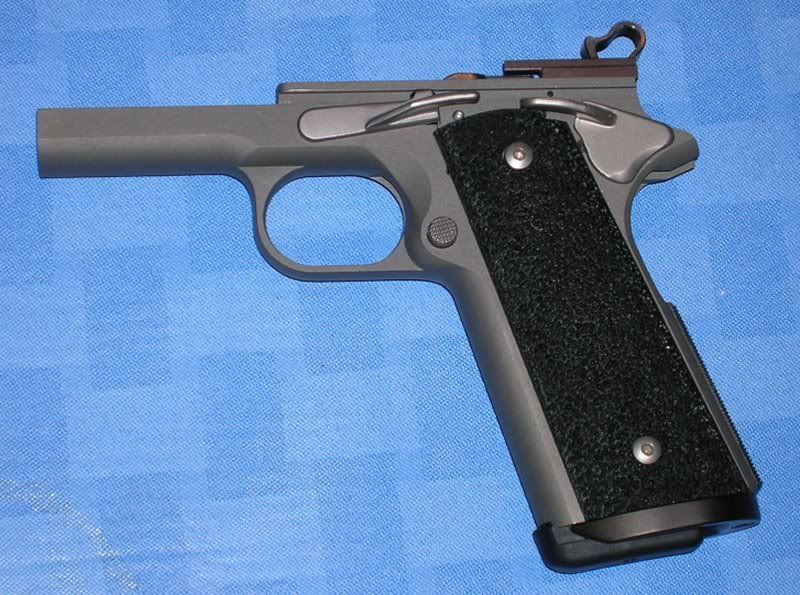
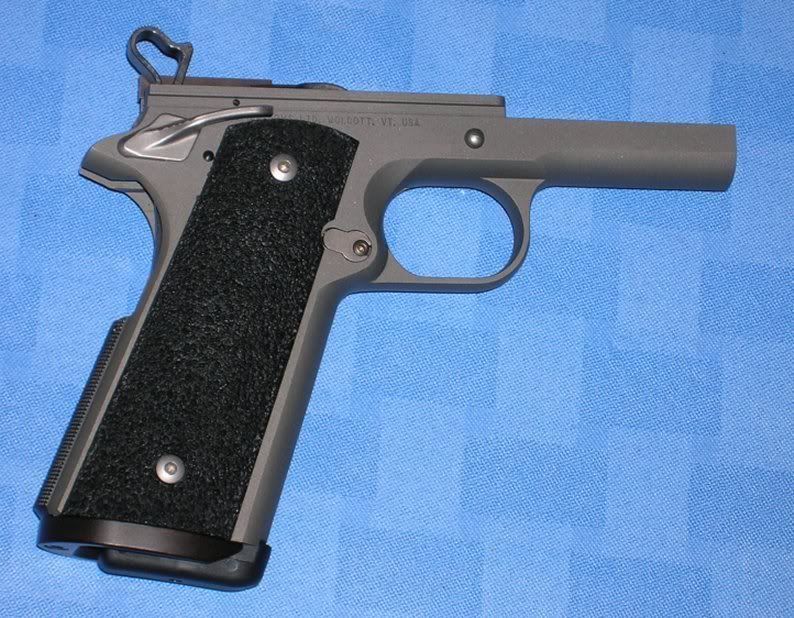 The undercut trigger guard can be seen in these pictures pretty well. This allows the middle finger to get a higher hold on the pistol frame. Coupled with the Chip McCormick high-ride beavertail grip safety, it will allow a very high grip for controlling recoil.
The trigger's not in the pictures because I need to file it before it will fit into the slot. The grip safety needs pretty extensive fitting, and isn't pictured. The plunger tube isn't fitted, because I haven't ordered it from EGW yet. The grip screw bushings were only loosely snugged to the frame, no red LocTite or staking yet.
Everything else fit pretty painlessly. Getting the sear, disconnector, and sear pin fitted into the frame properly is a pain in the butt though. I'll not be removing those parts any more than absolutely necessary.
I was pretty set on painting the frame black, until I'm satisfied with all the parts, the mag funnel is blended in, the fronstrap is checkered, and I'm sure that I'm not going to mess with it any further. Later, I would get it E-Treated or Melonite treated.
Seeing the parts assembled on the raw, grey, carbon steel frame, I'm thinking that I might have to change that plan and paint it grey. I dunno. Paint is cheap, fairly easy to apply, and comes off easy with chemical paint stripper, so it's not a real big deal either way.
