Showing posts with label parts. Show all posts

Sunday, February 9, 2014

PSA Pigsticker and Rainier XTC Comp Update

A while back, I bought a Pigsticker compensator from Palmetto State Armory, and put it on a 10.5" barrel.  Although it seemed to work fine, the muzzle flash was ridiculous. (Original Post)


Yesterday, I swapped the comp over to my 16" Spike's Tactical 5.45x39mm upper, and today I took it out to do some shooting.  Unfortunately, all is still not well.  The comp shoved the muzzle down hard and to the left.  I also couldn't get the tip of my pull-through cleaning rod out through the end of the comp.  No flash that I noticed, though.

The Rainer XTC did fare much better.  While I had the barrel vice blocks out, I put the XTC on my LMT 16" M4gery  Although there is a bit of concussion, there was no tuning fork "ting," and not too much muzzle lift.  Unfortunately, I had another Tula steel shell case get stuck hard in the chamber, cutting short that shooting session.  Even if I had a cleaning rod, it took a half dozen hard hits with a dead-blow hammer to remove it.

Saturday, June 2, 2012

Eagle Grips Kirinite Grips

Here's something different for ya.  Eagle grips is making these sort of pearl and marble lookin' grips out of something called Kirinite.  They have them in a variety of colors for 1911s and J-Frame Smith & Wesson revolvers, and just in blue and pink for Ruger Mk.II and Mk.III pistols.  Now, they are expensive, but damn (!), they are pretty!

You can check them out at the Eagle Grips website.  I expect that you'll find them at other vendors pretty soon.

Saturday, September 25, 2010

YHM Lightweight Railed Float Tube Review

YHM Rifle-Length Lightweight Tube on my RRA 16" 9mm Upper w/YHM wrench
Lots of holes, and the rails are milled out to cut weight.
I wanted another rifle-length quad-rail free-float tube to install on my 9mm upper, so that I could use the 9mm upper as a stand-in for training purposes. I wasn’t entirely satisfied with the Midwest Industries T-12 tube, because the rails didn’t seem to be true Picatinny-spec. I have to use a piece of a soda can as a shim to get the Vltor light mount to work with the MI handguard. I was told that YHM handguards are better in this respect, so I bought a YHM rifle-length tube to try out.

I tried the Vltor light mount on the YHM handguard, and it does indeed work properly without the silly shim. Everything else seems to fit fine on the YHM also.

I was afraid that the indexing/recoil lug on Larue mounts would not work with the milled-out rails, but the lug does still engage some of the rails on the lightweight tube. In .233Rem/5.56mm, there’s not enough recoil for the lug of the Larue mounts to really be necessary as a recoil lug.
Larue mount lugs just barely engages the milled-out rails
Along with the handguard, I ordered the YHM wrench. The YHM wrench has a spanner for the lock-ring at one end, and a barrel wrench at the other end. I would not count on using the YHM wrench to disassemble your upper, as you can’t apply much torque with it, although it may be enough to install the new barrel nut. I broke pins off my PRI barrel wrench trying to get the RRA upper apart (related post, PRI barrel nut wrench). When I got a new wrench back from PRI, it took a 3 foot length of pipe over my breaker bar before I finally got the barrel nut to come loose with a crack. The Model 1 Sales upper that I had taken apart before was almost as difficult to disassemble. The torque-spec for the barrel nut is more that 30 foot-pounds, but not more than 80 foot-pounds in order to get the hole or notch to line up properly with the hole in the upper for the gas tube. The RRA and Model 1 barrel nuts were likely overtorqued, the RRA in particular grossly overtorqued.

The YHM tool can not be used with a torque wrench, and would require a very large diameter pipe to use as a cheater bar for more leverage.

The YHM wrench works fine on the Midwest Industries lock-ring also, by the way.

Once I got the barrel nut/delta ring assembly, and front sight tower off the RRA upper, installing the new handguard was simple. It installs just like the MI handguard, except that it has two indexing screws, at 3 and 9 o’clock, instead of just one at 6 o’clock like the MI handguard. The barrel nuts of the YHM lightweight and MI T-Series handguards are nearly identical. The indexing screws for the YHM are slotted, where the MI handguard has allen-head socket screws. There were no tools or threadlocker included with the YHM handguard. The rail covers shown in some of my pictures were not included either.

The only minor issue I had was aligning the barrel nut so that the top rail of the handguard matched up with the rail on the upper. The 9mm upper is blow-back operated, and had no gas tube hole to use to align with the hole the barrel nut. If you are picky, it may take 2 or 3 tries to get the rails to line up just right, but the same is really true of most railed handguards.

The lightweight YHM does not give the full-length top rail effect. Although, as you can see in the photo below, the MI T-Series handguards don’t have a slot over the lockring anyway, so it really doesn’t make that much difference.
YHM Lightweight on Top, MI T-12 on Bottom
You may also note that the slots in the rails on the YHM lightweight tube are not marked ("T-Markings"). The center of the rails are milled out to save weight. This may be a problem for some.

The YHM lightweight handguards have holes at the front end for screwing in YHM’s sling mount. These holes are NOT QD sling swivel sockets for the swivels that release with a push-button. I believe that the top and bottom holes are for the YHM endcaps, and the holes on either side are for the YHM screw-in sling swivel studs, but don’t use either an endcap or a sling swivels, so I’m not really sure. Sling mounts and endcaps are sold separately.

I’m quite happy with the YHM Lightweight handguard. Depending on how the Spike’s Tactical slim handguard turns out, there’s a good chance that I may buy another YHM lightweight for my LMT 10.5” upper. I have no plans to buy another MI handguard until they start cutting the rails to proper Picatinny specifications.

EDIT 1/13/12:  I liked the 1st one so much, I got another for my Spike's 5.45mm upper.  When I decided to put a free-float, railed handguard on my SBR/pistol upper, I bought a mid-length lightweight handguard for that.  Yes, the Daniel Defense Lite handguard is slimmer, but I have not found the width of the YHM handguards to be a problem, and the YHM tubes are about a third the price of the DD Lite.  For me, it's an easy win for YHM.  Have not found anything yet that won't fit the YHM rails.

The Spike's slim handguard that I mentioned, comes with rail covers, and I think has QD sling sockets and an included sling swivel, but costs nearly what the DD Lite does.  I was tempted, but ultimately decided to skip it.

The free-float tubes with bolt-on rails have started to become popular.  My issue with these, is that when you start to bolt on more rail sections, they start to become heavier and more expensive than a quad rail handguard, while still lacking the versatility.  I also think they usually look sort of goofy, but maybe that's just me.

If you are looking for a YHM Lightweight handguard, Primary Arms has the cheapest prices that I have seen, so far, and service from them has been excellent.

Related Links:
Yankee Hill Machine Home Page

Wednesday, January 20, 2010

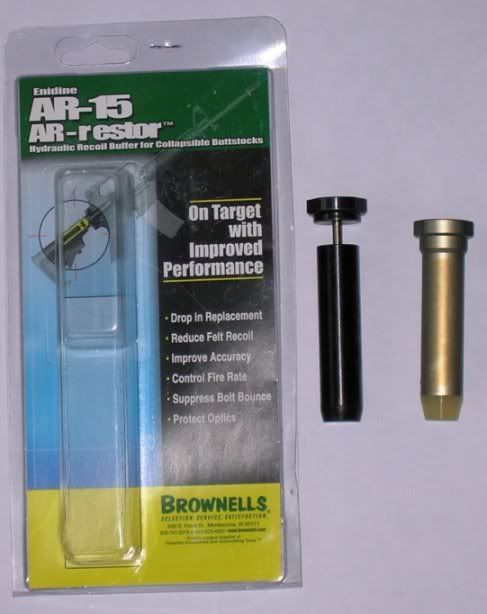
Endine AR-Restor Carbine Hydraulic Buffer

Packaging, left.  Hydraulic buffer, center.  Standard carbine buffer on right.

With the buffer installed with a 9mm upper, the rifle had a weird double recoil impulse.  It was sort of a ka-chunk effect.  Since it didn’t have any noticeable effect on performance, I went back to using the RRA 9mm buffer.

Shooting .223Rem ammo, I didn’t really notice the double recoil, but it still didn’t seem to have any noticeable effect on recoil control.  My 16” LMT M4 upper ran okay with it installed, but the 10.5” LMT upper was hanging up.  The 10.5” upper only ran well with a carbine buffer; I had the same problems with the “H buffer” though.

The 10.5” upper was run on full-auto.  Again, I still didn’t see any really noticeable increase in control.  Rate of fire didn’t seem to be slowed down much, although I didn’t try to measure it.

None of the uppers I tried with the Endine buffer would consistently lock open after the last round.  I tried the buffer in another lower, and got the same results.

My suggestion would be to skip the Endine buffer, and run the heaviest mechanical buffer that will still allow your rifle to function properly.  You can just about buy a carbine buffer, an "H buffer," an "H2 buffer," and a 3-pack of buffer springs for the price of the Endine buffer.

The 10.5” upper showed an obvious preference for the standard carbine buffer.  My 16” LMT upper will run on the carbine buffer, but seems to run a little better with the “H buffer.”  Some rifles will run with the “H2 buffer,” but I personally haven’t come across one yet.  When running a 9mm, you should run one of the 9mm buffers, but an H2, or H3 buffer might work.

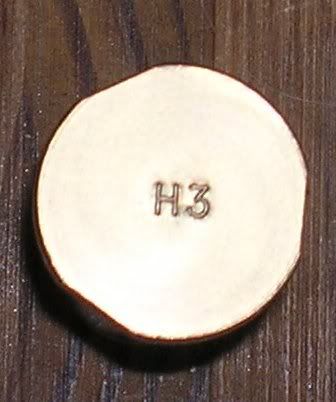
Just as an FYI, buffers are marked in the center.  Standard carbine buffers will have no markings.  Heavy buffers will be marked with an "H," "H1" (same as the "H", but markings vary by manufacturer), "H2," or "H3."  The "H3" buffer I ordered for an AR-10.  I don't think my 9mm buffer is marked, but it's black instead of the usual yellow zinc color.

Friday, December 18, 2009

TangoDown Stubby QD Vertical Foregrip


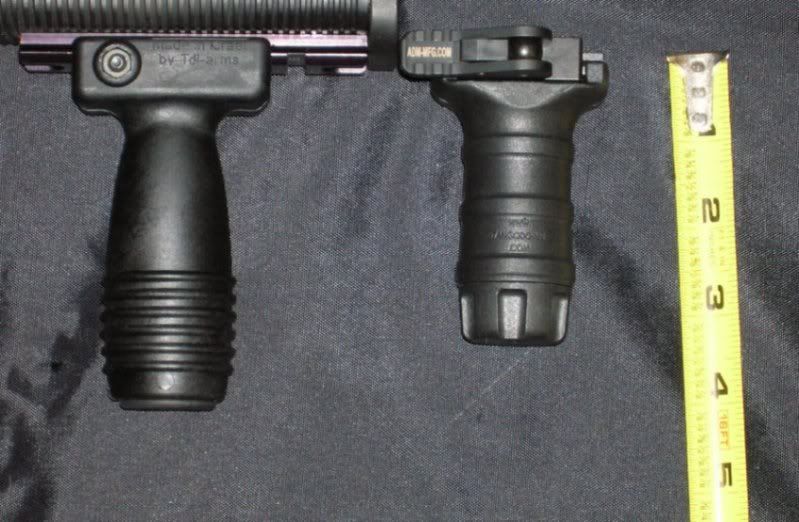
TDI/CAA K-Grip and TangoDown Shorty Grip

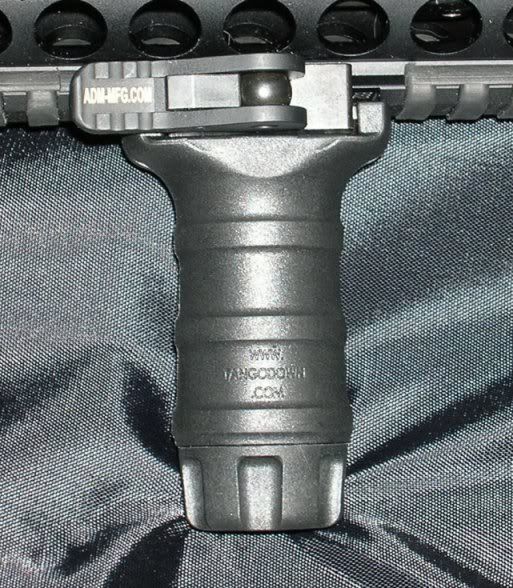
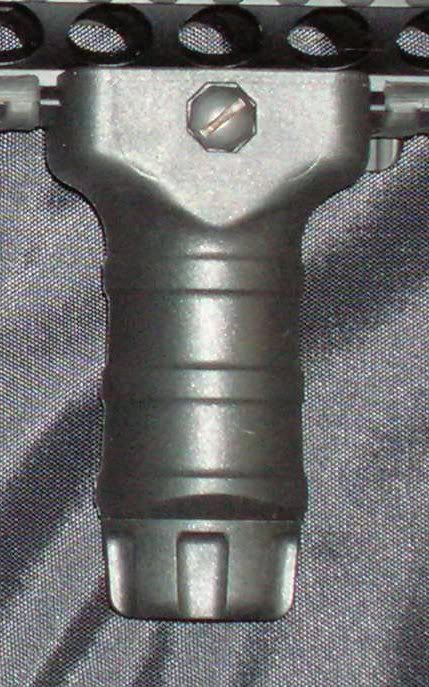
The TangoDown Shorty VFG is interesting in that it’s not round, or symmetrical.  Some thought was put into making it ergonomic.  The length of the grip is just long enough to get my whole hand around, but it’s not really designed for you to put your thumb around the back of the grip.  The stubby grips are really for people who put their weak-hand thumb pointing forward on the weak-hand side of the carbine.


Bottom View Of Grip Showing Teardrop Shape


Weak-Hand Thumb Forward VFG Grip

The o-ring-sealed compartment in the grip is just large enough to hold 2 CR123 lithium batteries, while still being sealed watertight by the o-ring.

The quick-detach mechanism is made by American Defense Manufacturing.  To remove the grip, you push in the release button and flip the lever out ninety degrees.  You can then pivot the grip off the rail without sliding it off the end of the rail.

I think the QD lever is worth the small increase in price over the standard TangoDown VFGs.  I can remove the grip to get the carbine into a rifle case, if necessary, or just to shed weight.  I can also swap it over to other firearms quickly, without tools or removing rail covers.  It’s also compatible with a wider variety of non-spec rails than the standard VFGs.

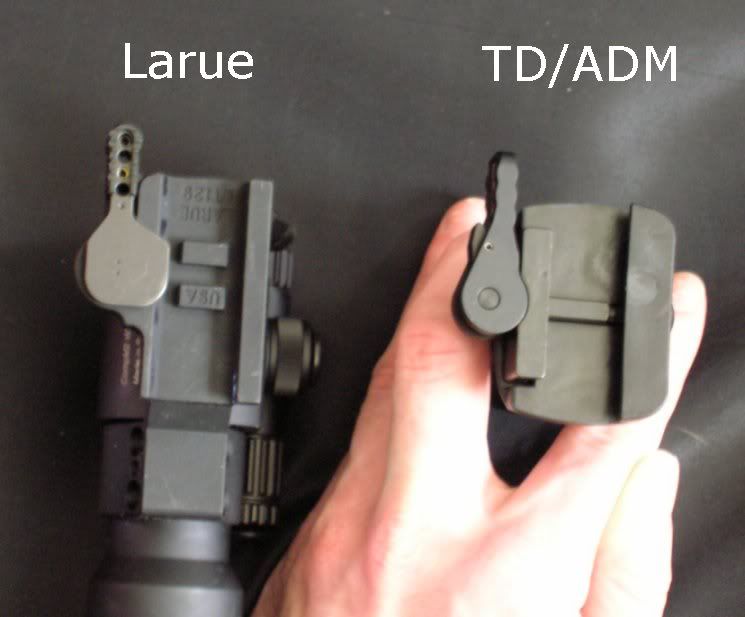
I like the QD lever of the Larue products a little better than the ADM lever, but the ADM lever is quicker and easier to adjust.  The Larue locking mechanism is more positive.  It’s possible to only partially press the button of the ADM lever, which won’t allow you to move the lever.  However, adjusting the Larue lever required a wrench and some trial-and-error.  The ADM is quick and easy to adjust by turning the screwhead opposite the lever.  The ADM clamping system is less likely to mar your rails than the steel tab of the Larue locking lever that actually holds the mount or VFG to the rail.  The big tab on the bottom of the steel Larue lever bears directly on the rail.


Larue QD Lever Mechanism Compared To ADM QD


ADM QD Clamp Adjustment Screw


Standard Larue Locking Lever, Showing Adjustment Mechanism

I’m not going to get into testing durability.  TangoDown grips have been around for a while, and have taken some serious abuse by military and civilian users.

Midwest Industries T12 Handguard

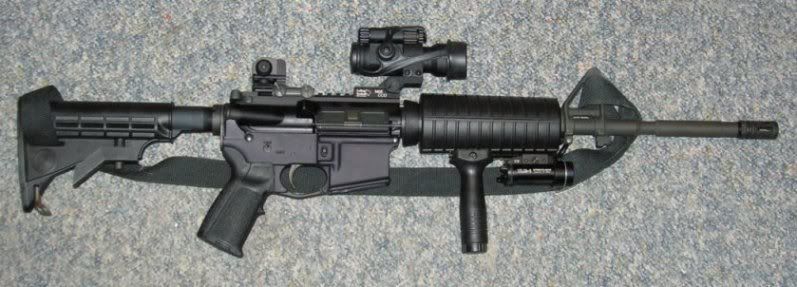
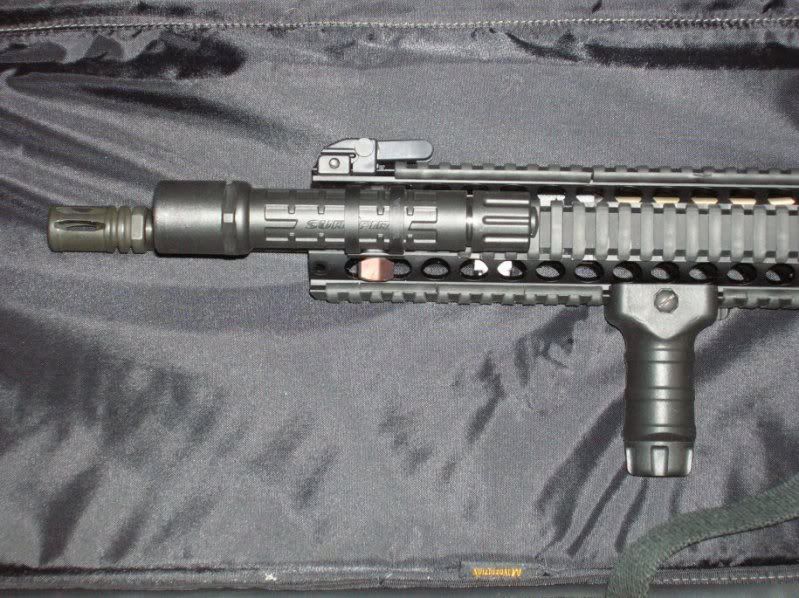
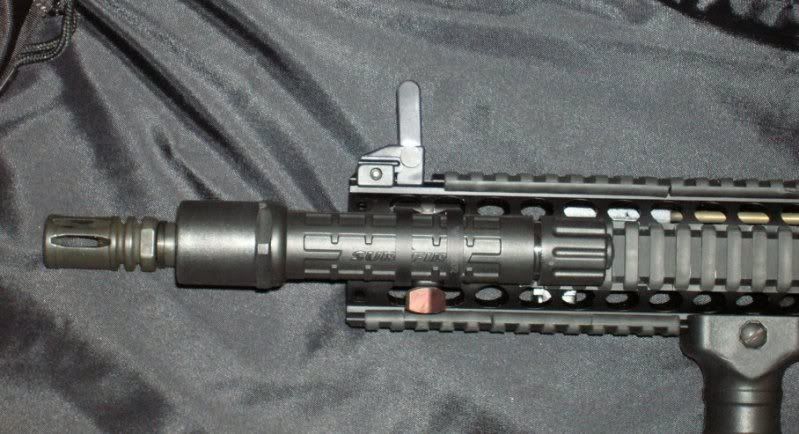
Before - Pretty Basic M4, Aimpoint is a very new addition

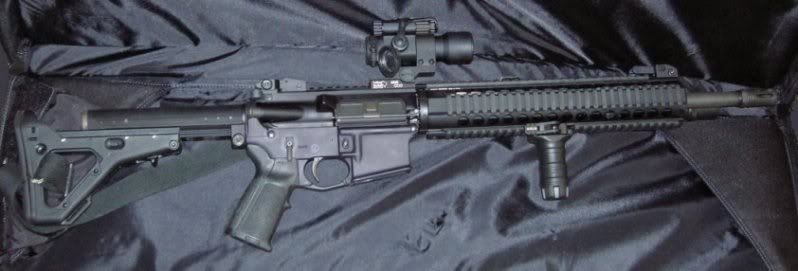
After, along with some other upgrades

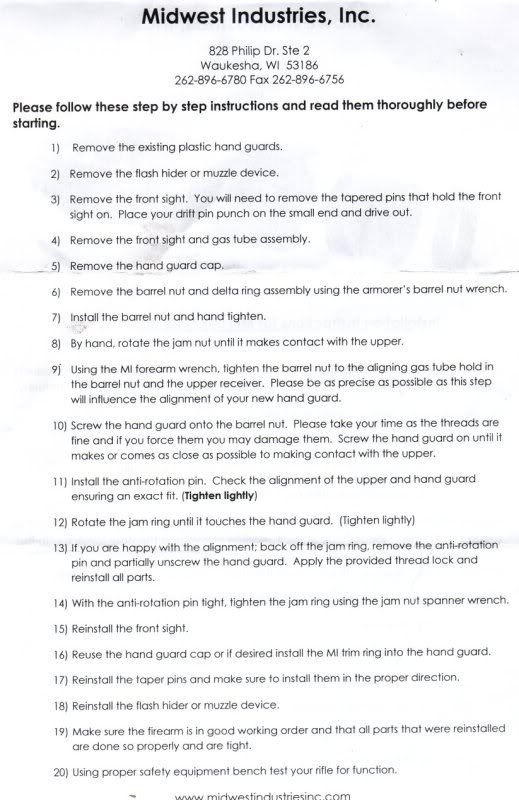
Instruction Sheet


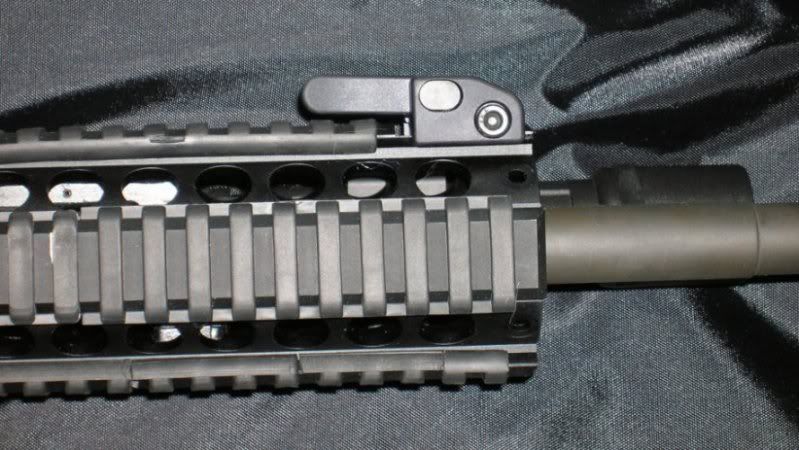
Midwest Industries (MI) is now making one-piece float tubes, in addition to their two-piece, no-gunsmithing, float tubes.  The one-piece tubes use an aluminum barrel nut rather than the steel G.I.-type barrel nut, which saves some weight.  The handguard itself requires less material than a two-piece float tube, saving a little more weight.  The one-piece tubes are also cheaper than the two-piece tubes, at about $155 vs.$228 for the 12" versions.

I was afraid that if I bought one of those $300+ handguards then I’d be afraid to really use it.  That, and I’m too cheap to drop that kind of cash, when I can get almost the same thing for about half the price.  I went with the rifle-length handguard on a 16” barrel because the rail I had bolted to the bottom of the plastic M4 handguard was proving to be too short.  I was pleasantly surprised with the MI Low-Profile rear sight, so I gave MI a shot with the railed float tube.

I’m liking the rifle-length handguard on the carbine upper.  I think I have more muzzle control with the vertical grip mounted farther out from the receiver (like Kyle Lamb says).  The extra length gives more freedom in bracing the rifle against hard cover without the barrel touching anything.  It gives a longer sight radius too, obviously.  It was worth the extra 2 and half ounces (15.4oz., rather than 12.9oz.), over the 10” handguard, I think.  Weight of the 12” Daniel Defense Lite tube (currently $332 at Bravo Company), by the way, is listed at 14oz.  The 12” Lightweight YHM tube (currently $139.95 at Bravo Company) weighs 14.75oz.  Price of the MI T12 at Bravo Company is currently $155, to give you a little bit of a comparison.

The handguard comes with the required Allen wrench for installation, a small vial of threadlocker, and a decent instruction sheet.  It doesn’t come with a spanner wrench for the locknut.  I might have bought a spanner wrench, but there wasn’t any available when I bought the handguard, so I just put the blade of a screwdriver in the slot of the locknut and tapped it with a hammer.  With the help of the threadlocker, the locknut is holding tight, and somewhat to my surprise, the screwdriver didn’t leave a mark on the ring.

Installation on an already assembled upper will require removing any muzzle device present, the gas tube, the front sight tower or gasblock, and finally the delta ring assembly or barrel nut.

Tools required:
1/16” pin punch for the gas tube roll pin
3/32” pin punch for the front sight tower pins (if present)
Hammer – claw hammer at minimum, those front sight tower pins can be tough to start moving
Grease – for removing and reinstalling front sight tower or gas block, and rust preventive on the barrel and steel parts covered by the tube
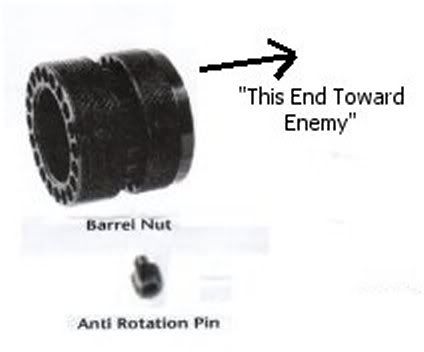
Degreaser – for cleaning MI barrel nut, lock nut, and anti-rotation screw before applying threadlocker
½” wrench, or large crescent wrench for muzzle device (if present)
Some sort of barrel nut wrench (should be under $25)
Vise
Upper receiver block (Model 1 Sales action block is about $35)
Torque wrench for reassembly (31 foot-pounds minimum, up to 80 foot-pounds is desirable to break-in the threads of the barrel nut, per the TM)
MI lock nut spanner, or hammer and flat blade screwdriver

I removed the sling swivel from the front sight tower, and shaved it into a low-profile gas block which required more tools – drill and 1/8” drill bit, Dremel rotary tool, cut-off wheel, stone grinding bit, files, and black BBQ spray paint.  I don't trust the set-screw type gas blocks, and didn’t want to spend $50+ for a clamp-on gas block.

Don’t forget to order another crush washer for the muzzle device if you want/need to use one.  They aren’t reusable (yeah, I tried; not enough friction to hold the flash hider on).  I think the peel washers are reusable, but I don’t like them, so I’m really not sure.


Anti-Rotation Pin Screws Into The Tube, Locking It In Place In Relation To The Barrel Nut

The handguard has an anti-rotation screw, very similar to the ones used with YHM tubes, except that it has a socket head rather than a slotted head.  The barrel nut also is very similar to the YHM nut.

The only issue that I’ve had with fitting things to the handguard was with the Vltor Scout Light mount.  The scout mount fit, but the rails on the handguard seem to be oversized, and the mount would not clamp the flashlight solidly in place without a little shim that I cut from a soda can.  The scout mount worked fine on the rail of a flattop upper, so it’s not the Vltor mount that’s the problem.

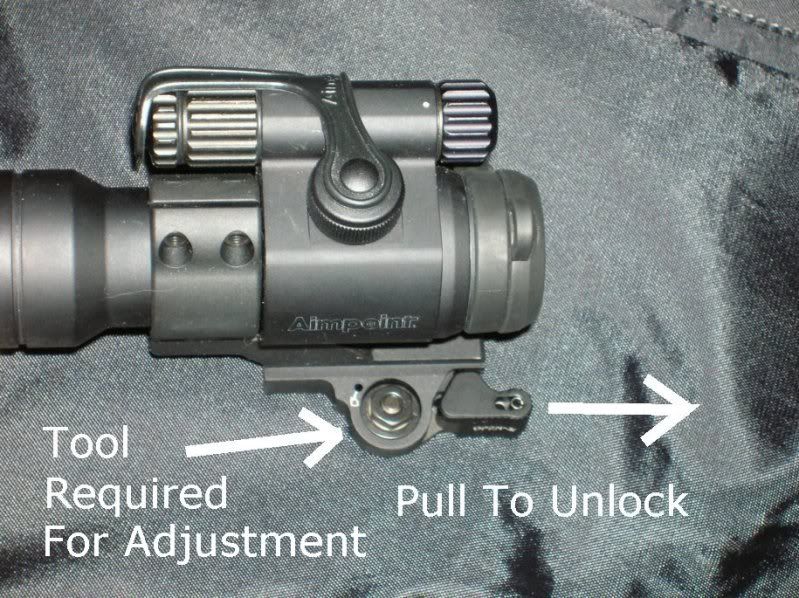
The Yankee Hill front sight, MI sling mount, Larue QD scope mount, and Tangodown Quick-Detach Vertical Foregrip all fit fine.

The only real complaint I have about the MI handguard, is the finish.  MI advertises that all their stuff is hard anodized, but I’m finding that it scratches really easily.  I was finding scratches before I even really used the rifle.  Not a big deal, but it might be if you really want a pretty “safe queen.”  The matte black coating on the Larue Beverage Entry Tool has held up to opening many “adult beverages,” so if you want a tube with a tough finish, you might want to give a Larue tube a try.

Non-spec rails aside, the handguard is okay.  It works with many accessories, but not all of them.  My newer YHM Lightweight hanguard seems to be made to the proper spec, and has worked with everything I've tried on it so far.

EDIT, 6/30/2010:
It seems that MI customer service is pretty aweful.  Check MarylandShooter's site for more details.

EDIT, 9/28/2010:  When I went to check the locking ring on the handguard with the YHM spanner wrench, the nut was pretty loose.  It might have been okay, but the wrench does seem to allow more torque on the nut.

Saturday, December 12, 2009

Yankee Hill QDS Folding Front Sight


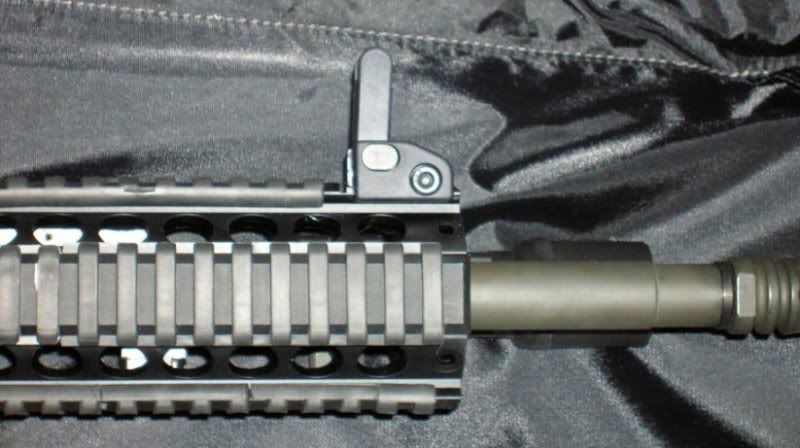
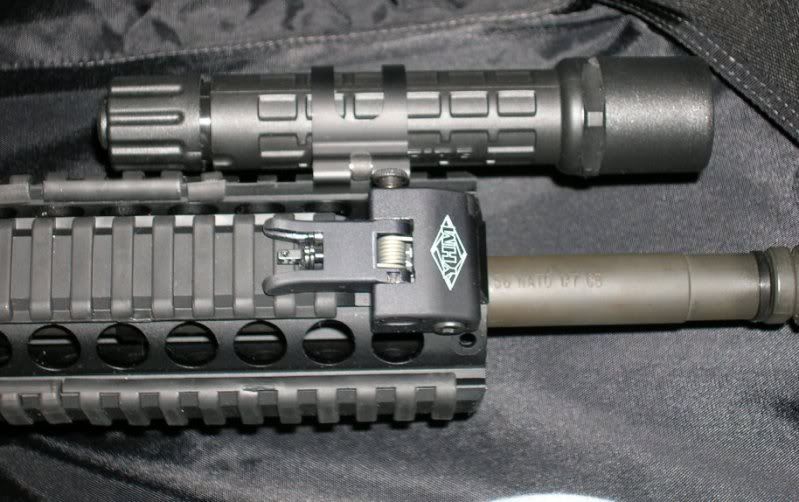
Why the M4-type ears, instead of the HK-type wings that wrap around the front sight? The same reason Chuck Taylor warned about the rings around HK front sights, and why Noveske was psyched when Troy released their M4-type front sight. The front sight is not necessarily centered in the ring, or semicircular wings, and in a snap-shot scenario, you might try to center the ring or wings in the rear sight, rather than the front sight itself. This would result in a bullet going somewhere you hadn’t intended.

When I first started fiddling with the sight, I was a little concerned. The button was stiff, and the sight was harder to deploy than I would have liked. After playing with the switch-sightblade (yeah, I know, sorry) for a little while, it loosened up, and it’s now quite acceptable.

You push the button on the side, it flips up, and locks in place. I'm a little afraid that a hard knock might do some damage, since it locks when unfolded, even though it doesn't need to lock since it's spring loaded. Maybe I'll take it apart and fix it so that it doesn't lock open someday.

I unscrewed the A2 front sight that came with the sight, and installed the Trijicon front sight with tritium insert that I had in the standard A-frame front sight base (that I hacked off). I got the carbine sighted in pretty quickly. The front sight isn’t hanging far above the wings, and I didn’t have to make any significant adjustments to the rear sight.

The sight comes with the required Allen wrench for mounting the sight, and it clamped onto my Midwest Industries handguard with no issues.

Although I would prefer a sight that doesn't lock when deployed, it does lock when folded, which I did want, and I wasn't thrilled with the wings or locking designs of many of the competing flip-up front sights. I took a bit of a gamble on the Yankee Hill sight, and it paid off. Next time I need a clamp-on front sight, I think I’ll be buying another one of these.

Saturday, January 17, 2009

1911 Build: Adjustable Sight Installed


I drilled and tapped the STI slide today, per BlindHogg's advice, and installed the Wilson BoMar-type adjustable sight. I've posted pictures of the assembled pistol before with the sight, but it was only slotted into place without the elevation adjustment screw.

It went much smoother than I had thought it would. The divot from the larger drill bit helped guide the one that actually drilled the hole. The bit went through the steel with very little effort. The tap cut the threads without breaking off in the hole (ugh, that really sucks). The edges of the leaf of the sight match up perfectly with the edges of the flat on the top of the slide. It was a high pucker factor job because I was working on the most expensive part of the pistol, but I couldn't be much happier with how it turned out.

The front sight is too tall, so it's shooting about 6" low. I ordered a tall front sight blank, so that I wouldn't end up with one that's too short. It's easier to file a tall front sight than it is to add height to one that's too short.
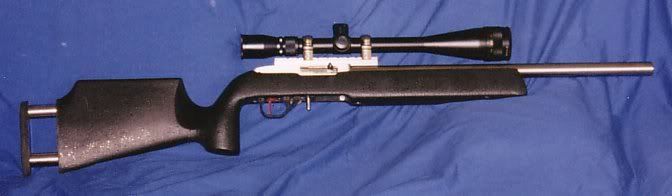
I was only shooting at about 25 feet, but I was able to get a group without much effort. The hardball rounds and the new lead semi-wadcutter ammo that I've been putting together both hit the same spot on the target. I haven't had any functional problems with either the CheckMate/Colt magazine or the CMC ProMag since the first outing.


I've been filing on the ejector of the M&P, and that hasn't been going so well. No matter what I've done, it's still throwing the brass at me. I seem to be shooting it a lot better than I was though.

I tried 15 and 13 pound recoil springs. I had thought that the 13 pound spring moved ejection more to the left, but I shot with the 15 pound spring again today, and I'm not really sure that there's any difference at all, besides maybe the speed of the ejecting brass.

Saturday, January 3, 2009

1911 Build: Parts List


The frame is a Caspian Basic in carbon steel. I've reported that.

The slide is an STI 5" "Unique" cut. The slide is milled for a Bo-Mar type adjustable rear sight, and a dovetail front sight. It has a flat top and front cocking serrations. It was made to order, and took a few weeks.

The rest of the parts are as follows.

PART
BRAND/MODEL
SOURCE

Barrel
Kart Easy-Fit, 5" non-ramped
Brownell's

Barrel Bushing
Kart Easy-Fit
Brownell's

Barrel Link
Kart Easy-Fit
Brownell's

Barrel Link Pin
Kart Easy-Fit
Brownell's

Disconnector
Extreme Engineering Ultralight
Shooter's Connection

Ejector
EGW Extended
Midway

Ejector Pin
EGW
Shooter's Connection

Extractor
Aftec
Shooter's Connection

Firing Pin
STI Titanium - .38Super/9mm*
Brownell's

Firing Pin Spring
Wolff Extra Power
Brownell's

Firing Pin Stop
EGW Oversize, Series 70
EGW

Front Sight
Yost Bonitz blank
Midway

Grip Bushings
Cylinder & Slide
Midway

Grip Safety
Chip McCormick Extreme
Midway

Grip Screws
Kimber
(temporary)

Grips
Pachmayr Signature GM-45
Midway

Guide Rod
Wilson 1-Piece, G.I. style
Midway

Guide Rod Plug
"O.E." (Actual Source Unknown), checkered, appears to be dark Parkerized
CDNN Investments

Hammer
Extreme Engineering Ultralight
Shooter's Connection

Hammer Link Pin
EGW
Shooter's Connection

Hammer Pin
Kimber (with groove for "pinned" ambi safety)
Midway

Hammer Strut
Ed Brown
Midway

Magazine Catch Lock
Kimber
(temporary)

Magazine Catch Spring
Kimber
(temporary)

Magazine Catch/Release
Kimber
(temporary)

Mainspring
Wolff 18lb.
Brownell's

Mainspring Cap
EGW
Shooter's Connection

Mainspring Cap Pin
EGW
Shooter's Connection

Mainspring Housing
Ed Brown Maxi-Well, 25lpi Checkering
Midway

Mainspring Housing Pin
EGW
Shooter's Connection

Mainspring Plunger Detent
EGW
Shooter's Connection

Plunger Spring
Kimber
(temporary)

Plunger Tube
EGW bolt-on
EGW

Rear Sight
Wilson Bo-Mar type
Shooter's Connection

Recoil Spring
Wolff (16lb., for now)
Midway

Sear
Extreme Engineering Ultralight
Shooter's Connection

Sear Pin
EGW
Shooter's Connection

Sear Spring
Clark 4-leaf
Brownell's

Slide Stop
Wilson extended
Midway

Thumb Safety
Kimber "Pinned" ambi
Midway

Trigger and long curved shoe insert
SVI
Brownell's


Except for the hammer pin which came with the thumb safety, and the barrel link pin which came with the barrel, the pins and plungers all came in a set.
Some parts were borrowed from a Kimber 1911, until I get around to buying the rest of the parts.
Barrel, bushing, link, and link pin all came as a set.
Hammer, sear, and disconnector came as a set.

* - all STI Slides are set-up for .38Super/9mm firing pins

Sunday, November 16, 2008

1911 Build This Week


I haven't posted any updates on the build recently, because I was practicing for the championship match at a local club. Turned out to be a bit of a disaster for me, because I hadn't anticipated a bullseye stage. But I digress. . .

Picture's not great, but there will be more to follow in the future.

I dumped the Falcon Ergo grips. The grip texture is nice, but the panels don’t come far enough forward for my taste. I picked up a set of Pachmayer Signature GM-45 grips. I wasn’t thrilled about the idea of rubber grips, but they feel right and aren’t as tacky (as in sticky, not unfashionable) as the Hogue rubber grips, allowing some grip readjustment. The only small issue with the Signature grips is that they really aren’t made for pistols with magwells, as the bottom of the grip panels are tapered. I will probably cut off the lip at the bottom of the frontstrap too, because it doesn’t allow you to get a grip on the magazine basepad or baseplate if there’s a double feed and you need to rip out the magazine.

The grip safety is 100% finished now, I think. The left side of the thumb safety has been cut to match the curve of the grip safety.

EGW is going to resend my order on Monday. USPS put up a fight on the lost package claim.

I did get the dovetail file from Midway, so I got the Wilson Bo-Mar type sight installed on the slide the day after I took the picture. Either the sight's dovetail was too large, or the cut in the slide was too shallow. Either way it took quite a while to get it to fit. I'm pretty sure the Wilson sight is hardened steel, as it put up a fight. The Yost Bonitz front sight that was supposed to fit according to Midway, had a dovetail that was way too large to fit the cut in the STI slide, so I spent a couple hours filing it to fit the slide. I still have to shape it, and then file it to the right height eventually.

Got some Dykem for fitting the barrel in the same order as the dovetail file, so I can get working on that too.

Friday, August 1, 2008

Sights for Defense Pistols

(This was a response to a question on a message board, I thought it may be useful to those reading the blog also)

I have Heinie straight eight sights with the wide notch on my Glocks. Pretty much the same as the Warren Tactical sights, except they are serrated.

I still have a couple pistols with Trijicon and Mepro Tru-Glo sights. The light bars between the front sight and the edges of the rear sight are way too small. Front sights pretty much fill the whole notch and it's hard to tell if you've really got the pistol pointed straight. After discovering better sights, I started buying pistols with whichever sight set is cheaper, then I change em out with a good aftermarket set.

My rimfire conversion upper has the Glock adjustable sight. It's not so bad on the 22 slide, but I wouldn't have one on defense or competition pistol. A little too fragile.

Tuesday, May 13, 2008

Heinie Sights for New Kahrs Coming!

What's New at Heinie

It's down at the bottom of the page. Currently, you can get sights for Kahrs from Heinie, but only the 1st gen pistols. My PM9 currently only has the factory metal sights with two dots painted on. I'll probably pick some of the Straight Eight night sights sometime in the future.

Listed price is $110.83, which is reasonable considering the machining put into the sights, and the Trijicon Tritium inserts.

Sunday, January 13, 2008

Review: Scherer Slug Plugs for Glock


Glock 17 and Glock 19 with Scherer Slug Plugs
Scherer Slug Plug

For 17/22/24/31/34/35/37 Gen1, Gen2, and Gen3 frames, it's great. Helps keep magazines from hanging up on the web at the back of the magazine well, and keeps dust and junk out of the action.  Will not fit SF frames.

For 20/21/19/23/32 Gen1, Gen3, and Gen3 frames it doesn't quite fill the void entirely, but it does fit, and is an improvement.  Will not fit SF frames.

You can get away with them in some IDPA matches, but not for others.  It depends on whether the person reading the rulebook:
  • Places the exclusion of "[e]xternally visible modifications other than grips or sights," rule higher than the allowance of, "[p]lastic plugs may be used to fill the opening behind the magazine well."
  • Considers the Slug Plug to be a magazine funnel
  • Considers the Slug Plug to be a modification of the grip or a part added to the frame
You can try arguing, but it may not help.  It's a bit like arguing that the Second Amendment says "the right of the people to keep and bear arms, shall not be infringed," to someone who believes that the 2nd Amendment doesn't apply to "the people," because it also says that, "[a] well regulated Militia, being necessary to the security of a free State," and they think that you are not in the militia, or that well regulated means that states and federal government can regulate the arms of the militia.  There is too much room for interpretation.

Plugs that extend below the frame, are not allowed in USPSA Production division.  You may be able to get away with them in some club matches, at the discretion of the people running the match.


I would use the brass plug from Taylor if I were going to carry a 3rd Generation 20 or 21.  The Taylor plugs fill the void better. The brass plugs are specifically disallowed by IDPA rules, though.

UPDATE, 8/21/2010:  Added Photo
UPDATE, 5/26/2013:  Added that Slug Plugs may or may not be IDPA legal.  Change link to Taylor Slug Plug.  Note that the Scherer plugs do not fit Gen4 or SF frames.  Add notation on USPSA production with link to NROI ruling.

Sunday, November 18, 2007

JP Enterprises Glock Magazine Funnel Review


It's really more like a bowl with the flat bottom cut out than it is a funnel. It is light, it looks pretty good (matte black), it feels pretty good on the grip, and it fits in the IDPA box. Dawson makes a lightweight funnel that's IDPA ESP class legal too. The lightweight Dawson ICE mag funnel is the better product. I think that even slug plugs work better for getting the mag into the pistol quickly.

Wednesday, October 17, 2007

Lone Wolf 3.5 Pound Glock Connector Review

About a month ago, JR of Lone Wolf Distributors offered to send out free Lone Wolf 3.5 connectors to the first 1000 people to order and use a promotional code. I squeaked in near the end of the last day of the offer.

The raw data:
Stock 5 lb. connector (slightly worn) – 4 lb. 13 oz.
Stock 5 lb. connector with NY-1 leaf spring (no coil spring) – 6 ½ lb.
LW 3.5 connector (brand spankin’ new) – 3.5 lb. Really!
LW connector with NY-1 leaf spring (no coil spring) – 4 lb. 10 oz.
Scherer 3.5 connector (new) – 4 lb.
Scherer with NY-1 leaf spring (no coil spring) – 5 lb.

My trigger pull weights will likely be lighter than what you might get with a new, unaltered pistol. I stoned the rough contact areas on the trigger bar smooth, and then mirror polished everywhere on the bar that may contact something else. IIRC, this stoning and polishing cut about a half pound off the pull weight initially, and it seems to have dropped a few ounces after a few hundred rounds and some dry firing.

Related Link: 25¢ Trigger Job

Trigger feel with LW connector
If you ride the reset, you get a really nice, crisp break. If you release the trigger all the way, there’s a short amount of pre-travel, some mushy creep, and then the break. It’s not too hard to “prep” the trigger, pulling through the creep as you fine tune the sight picture.

The distance to reset feels like at least twice the distance it takes to “break” the trigger, obviously, there’s still some overtravel. The reset may be a little weaker than the OEM 5 lb. connector, but probably not by much.

Compared to the LW connector, the Scherer seems to have a lot more creep, I’ll say 20-30% maybe. The take-up with the Scherer feels noticeably lighter than the creep. With the trigger completely released, the pull feels better to me, compared to the LW connector. When riding the reset however, the LW feels better than the Scherer.

Then, I did some testing with a NY-1 trigger spring with the coil spring removed. Why remove the coil spring? An 8 pound trigger, for me, is too much. But anyway, with the olive NY leaf spring, the difference between the two 3.5 connectors wasn’t as noticeable. The LW connector gave a slightly lighter pull, but both 3.5 connectors pretty much felt the same. The 5 pound Glock connector gave a crisper pull, with about half the creep, but resulted in a fairly heavy six and a half pound trigger pull. I’m putting the NY-1 spring back in it’s bag, and sticking with the stock five pound configuration.

As I have reported before, the LW connector I ordered about a year ago didn’t really function with a NY-1 leaf spring (Click Here For Article). There didn’t seem to be enough trigger travel to release the firing pin instantly. There were no such troubles with the freebie connector. The pistol functioned normally with the new connector and the leaf spring.

Slide Drag?
I tried to detect some of the slide drag that is mentioned by some. If there is any with the connector that I received, in the G17 I tested it in, it’s really not enough for me to notice.

After Live Fire Testing:
I shot about 150 rounds with the LW connector installed. No problems, I just don’t like the mushy creep. To be fair, I never liked the feel of an OEM 3.5 connector or Scherer connector without substantial gunsmithing either, and the trigger feel with the LW connector is still better than the triggers of many DAO and Glock knock-off type pistols. If you shoot from reset all the time, it’s really sweet, but I don’t always do that myself.

Installing the connector
I tried doing it without removing the locking block pin, and trigger pin. It works, but there’s a lot of wrestling required. Maybe it’s easier with a 40 caliber ejector, I dunno.

I’d rather remove all the pins, lift the locking block a quarter inch or so, and remove the trigger and trigger housing as a unit. The trigger spring is a weak point in the Glock design, and I’d rather not mangle it any more than absolutely necessary. It takes me maybe a couple minutes to change out a connector this way, and I don’t see how there’s much room to mess it up. There’s only two springs to deal with. The trigger spring is hooked to the trigger bar at one end, and the trigger housing at the other end, and you don’t have to unhook it to change the connector. Just insert the pins and slide release lever in the order specified in the twenty-five cent trigger job instructions, and all should be well.

Monday, September 3, 2007

Carver Hunter Mount Review


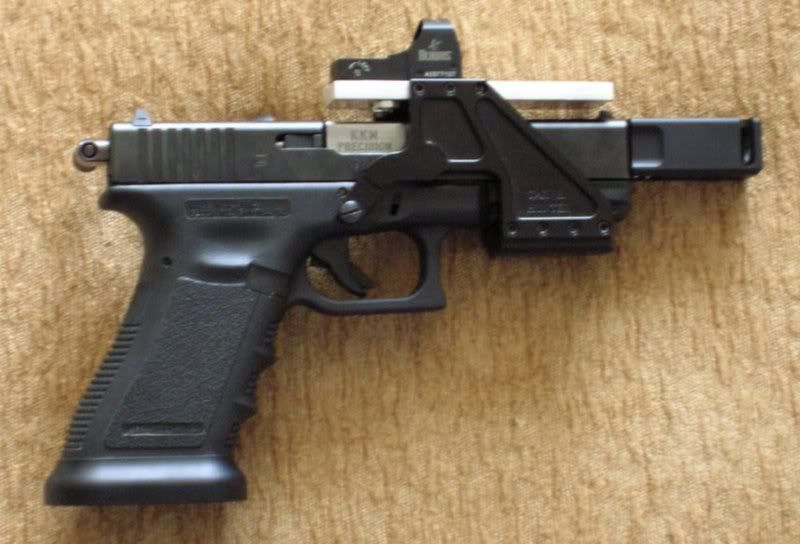
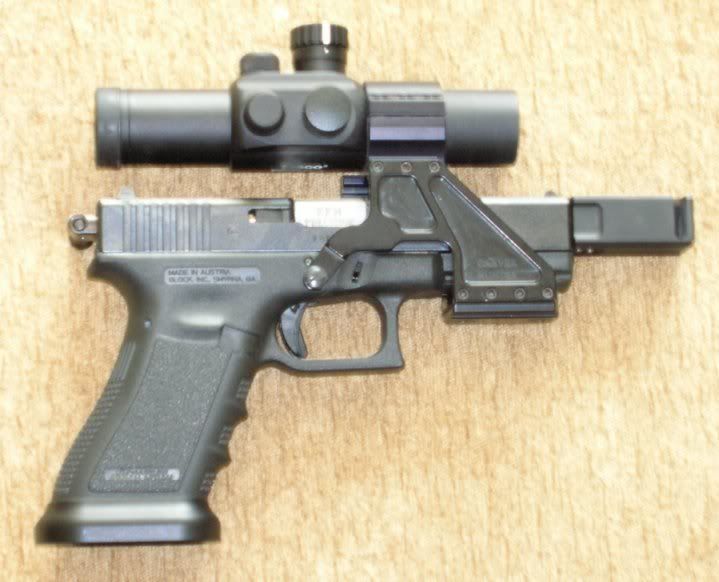
I bought one of the Carver Hunter mounts for a 30mm tube scope about a year ago for my Model 17. With the proper recoil spring and some threadlocker on the screw that replaces the trigger pivot pin, the mount works great.

With the factory recoil spring, the brass was going straight up, bouncing off the scope, and sometimes getting stuck between the breechface and barrel resulting in what looks like a stovepipe failure. I found that a Wolff 14 pound recoil spring on an aftermarket guide rod solved this problem. With an SJ Custom 9mm Major compensator, a 10 lb ISMI spring for a 1911 (only use with reduced power firing pin spring), coupled with a Glock factory ejector for a .40 S&W pistol worked (EDIT: worked fairly well, not quite 100% reliable). These spring and ejector changes result in the ejected brass going out under the scope, without any jams (EDIT: not quite). My slide is not modified, no enlarged ejection port.

Without using threadlocker on the screw that replaces the trigger pivot pin, the point of impact slides to the right as the screw loosens under recoil.

Although not really a functional modification, I've found that the Mako slide racker, that replaces the slide cover plate, makes using the pistol a lot easier, and probably helps keep me from knocking the scope as I unload the pistol. The other screws seem to stay put.

Now that I've got the springs and threadlocker thing figured out, I don't have any problems with the mount, even without the ejection port modification. With the red dot scope, I'm shooting much faster and more accurately that I can shoot the same pistol with iron sights.

Carver Web Site